
This is about … .
Mechanism
Negotiation
The first step is to inform what software and SSH version are used by both the client and the server. Then, they are trying to find the key exchange and message authentication algorithm that suits them both.

SSH header and payload sit atop the TCP header and look something like this:
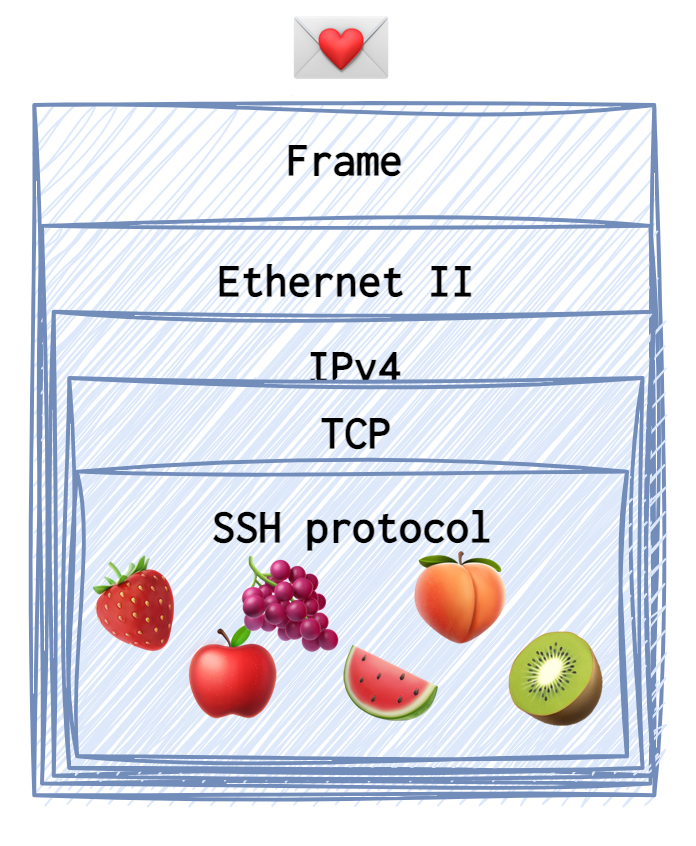
❗️ All the data and the requests the were generated by the client 🥶 are coloured in blue. Each type of request or reply (the SSH payload, to be precise) sent has its own dedicated emoji (for example, the identification string is a 🍓).
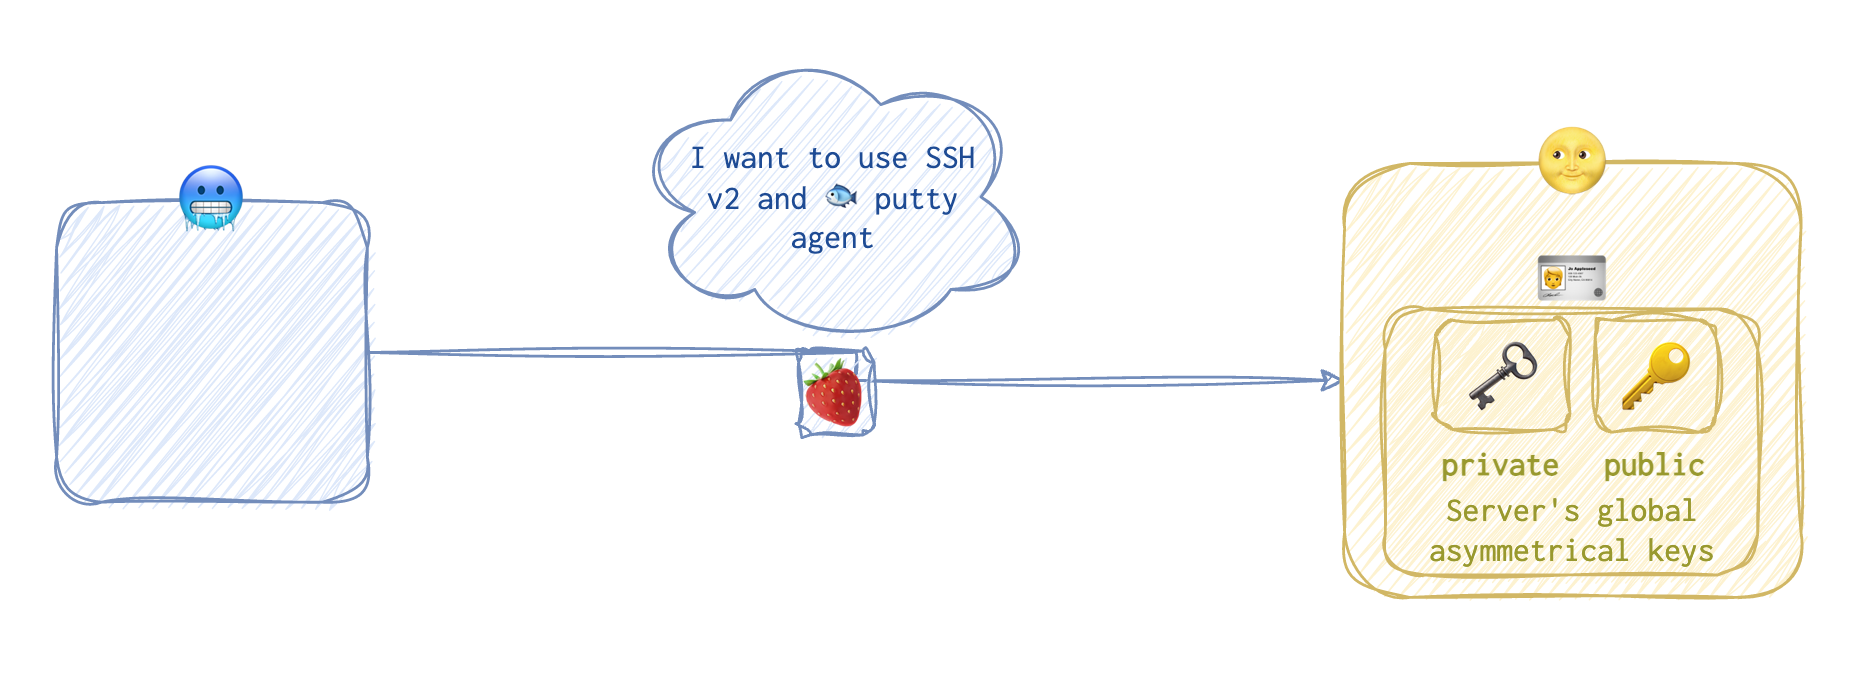
Since the client 🥶 needs the service, the client 🥶 initiates the connection and presents his preferences for both the SSH version and the software. This is called an identification string 🍓.
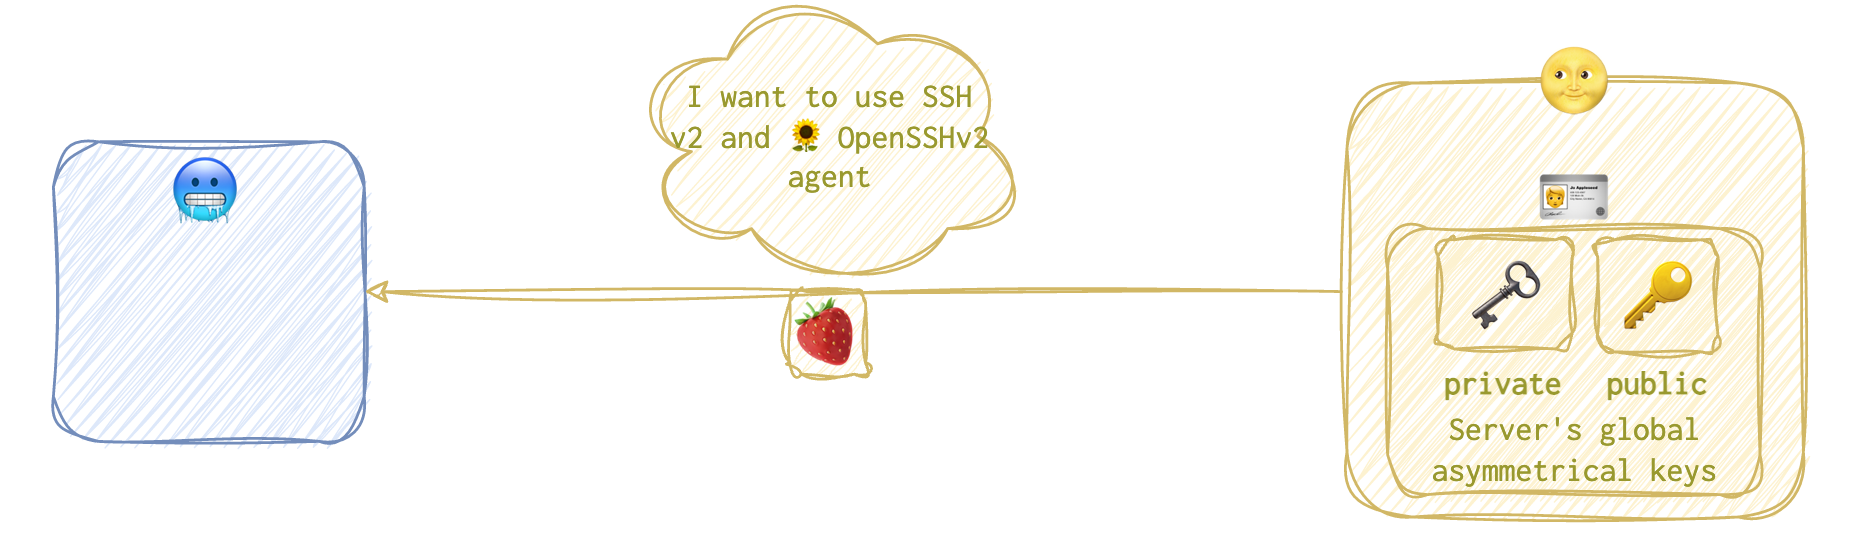
The server 🌝 then demonstrates it’s “household” with a similar reply 🍓:
 Now, they need to agree on the settings: ciphers and hash algorithms. First, the client 🥶 is coming out with the
 Key Exchange Init 🍎 message.
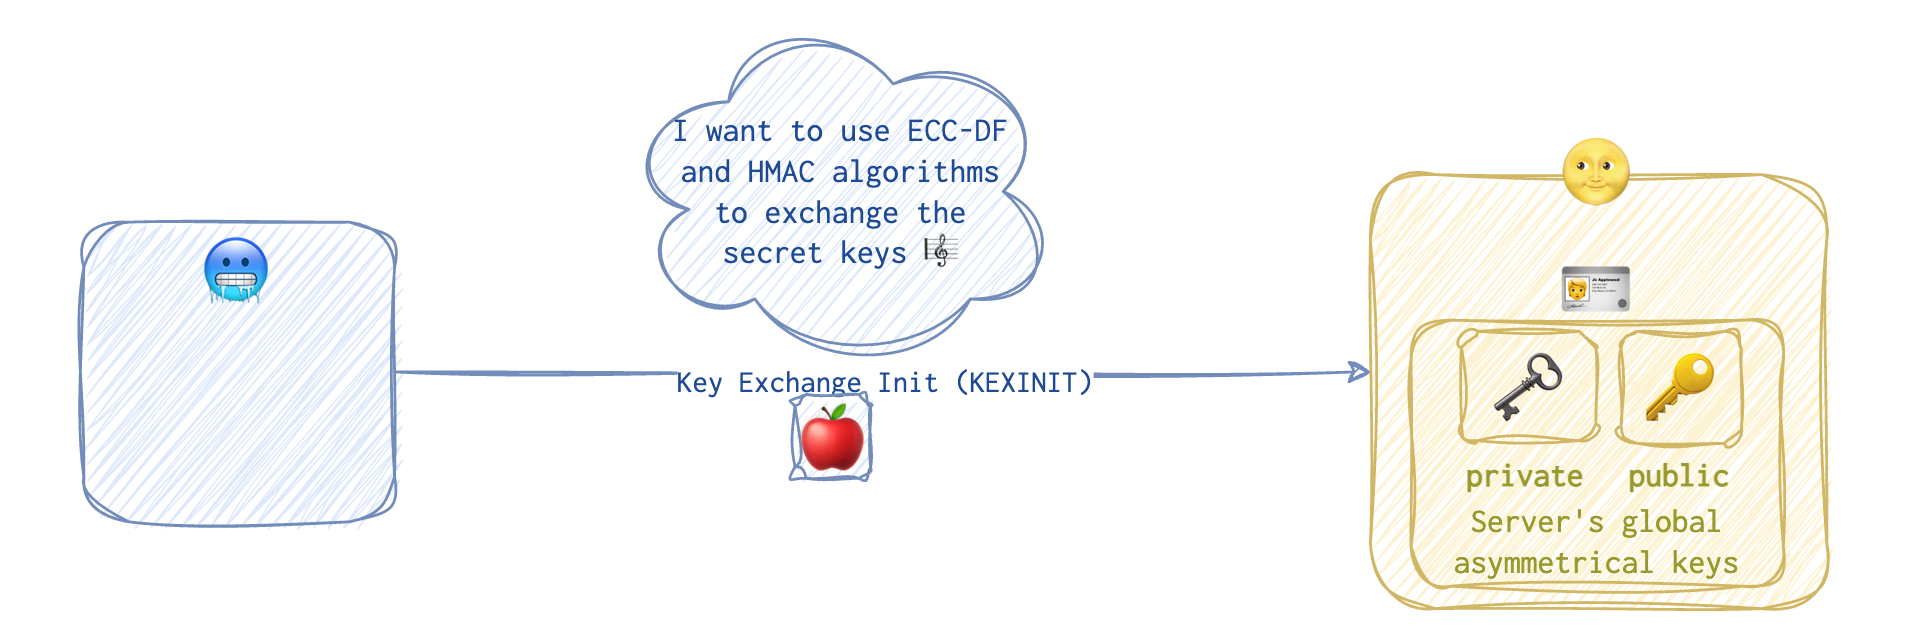
Then the server 🌝 sends a similar Key Exchange Init 🍎 message showing its acceptable cipher suits.

The server 🌝 typically uses the first acceptable option presented by the client. But if none is acceptable for the server 🌝, the SSH connection won’t be established.
🎼 🤫 Session Key Generation
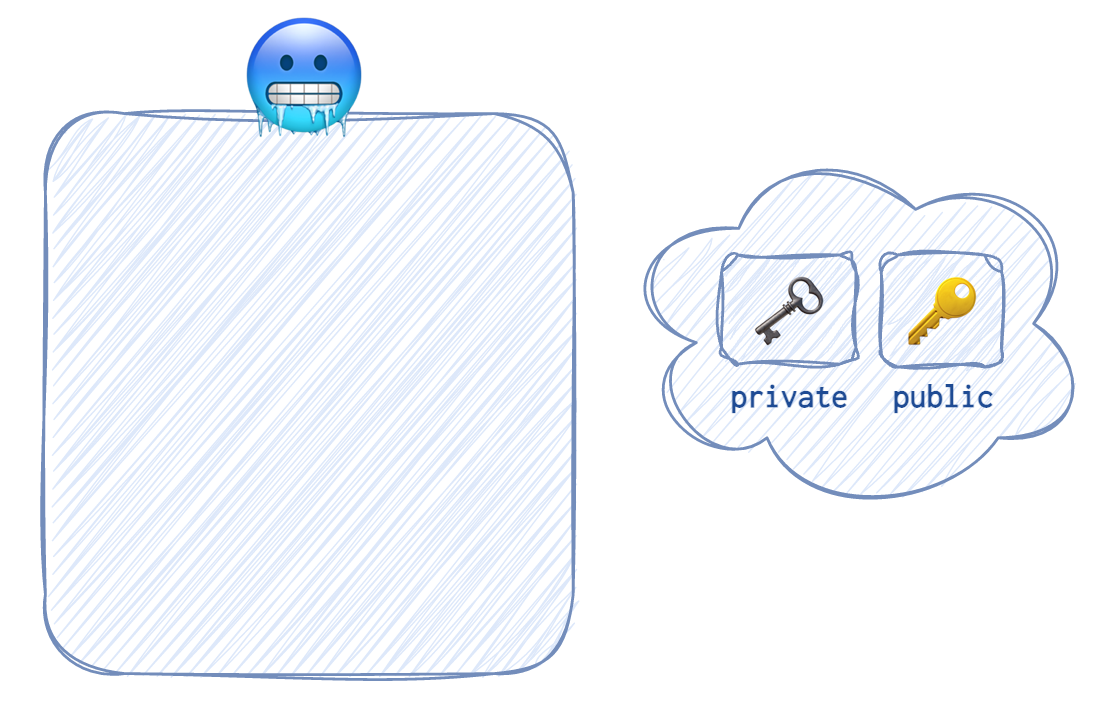
The client 🥶 generates two keys: a private 🗝️ and a public 🔑 one. The algorithm used for this key generation was agreed upon in the previous stage. Often it’s Elliptic Curve Diffie-Hellman or Diffie-Hellman. To understand how Diffie-Hellman works to exchange secret keys without actually sending them over (something like when scientists from different parts of the world come up with the same ideas).
 The client’s 🥶 public key 🔑 is then sent over to the server 🌝 and that’s called an
 SSH message Key Exchange Initialisation 🍇.
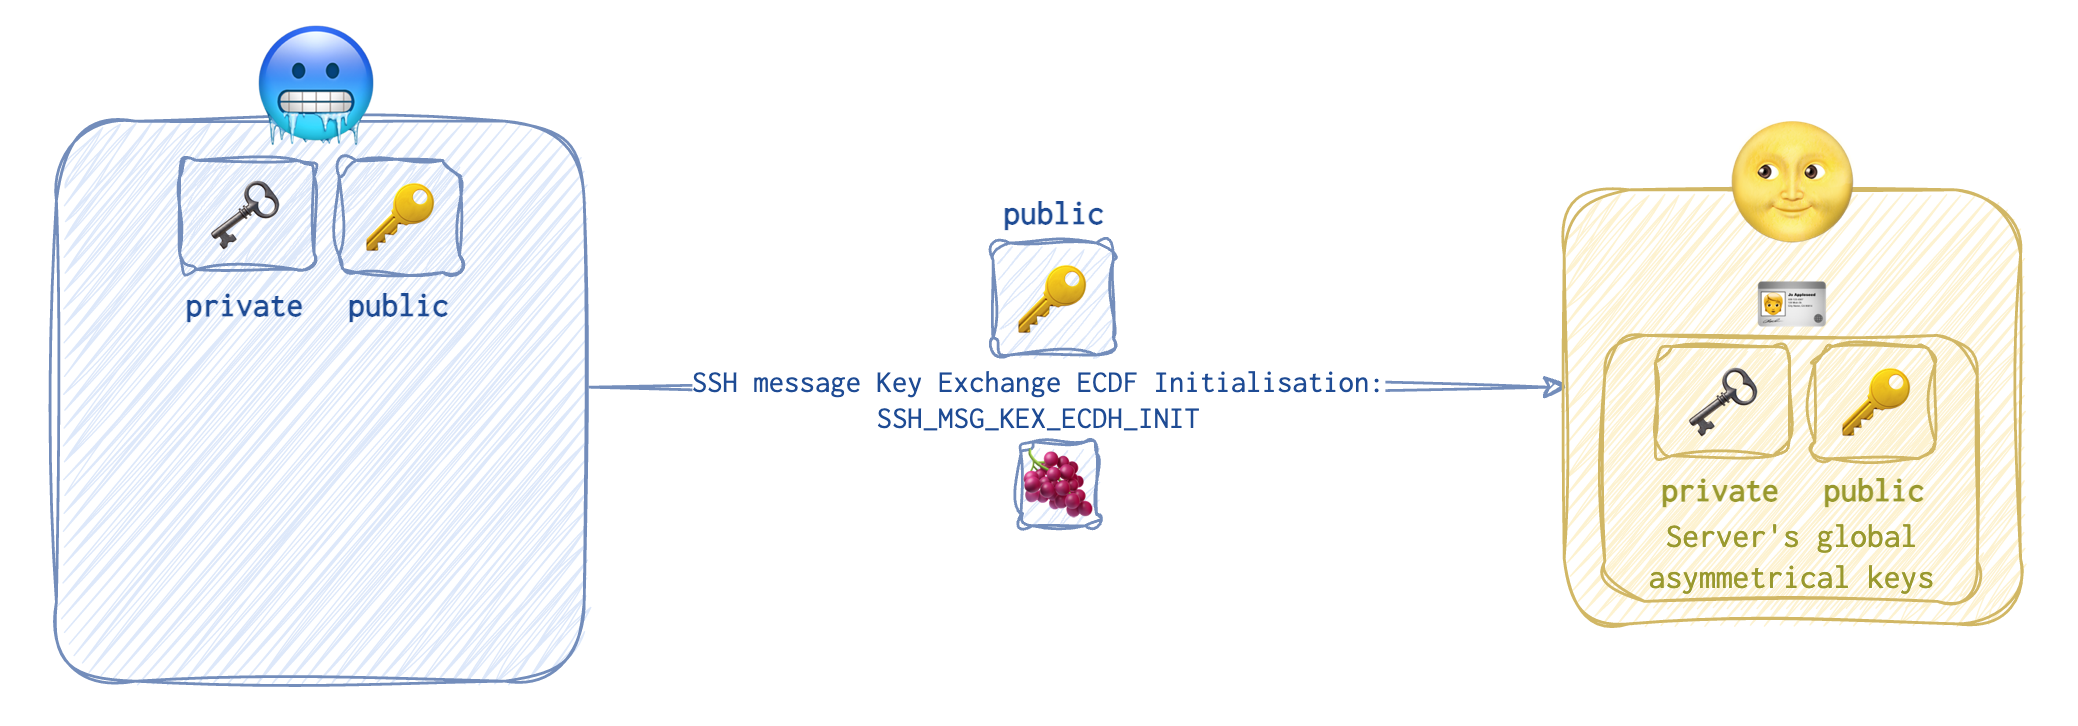 Upon receiving the client’s 🥶 public key 🔑, the server 🌝 starts generating its own pair of asymmetrical keys.
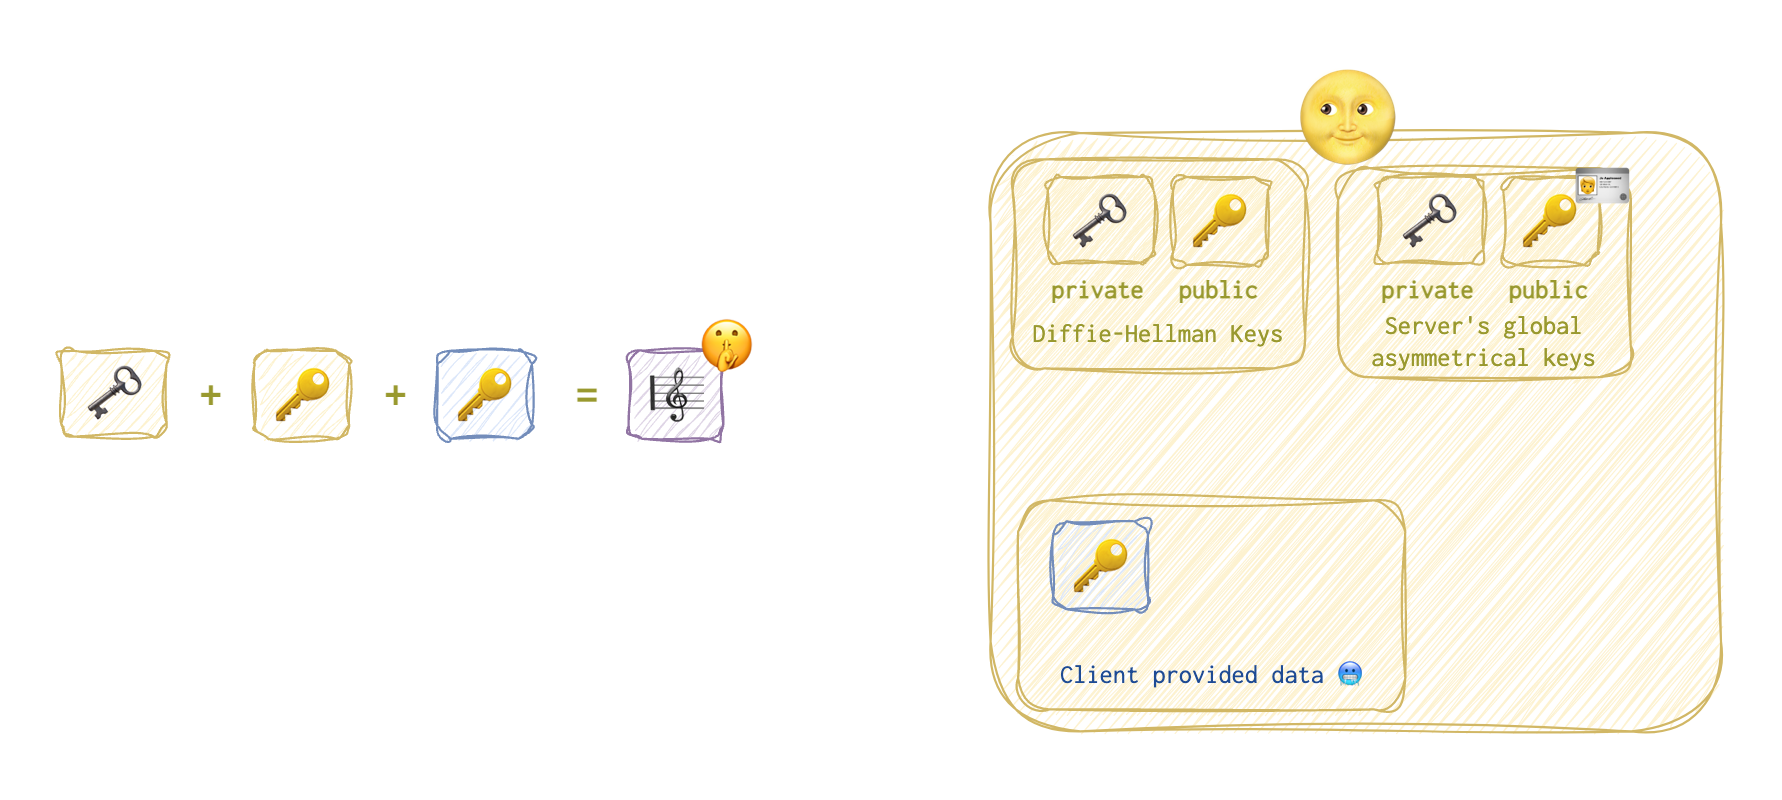
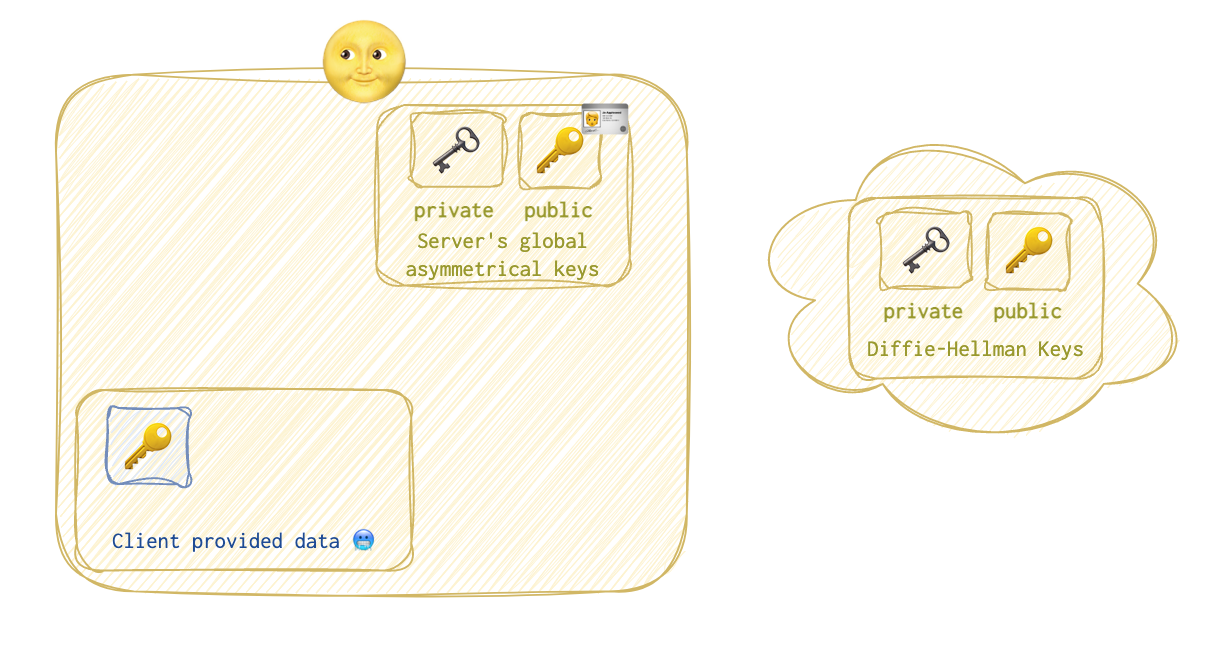 Here are the states of both the client 🥶 and the server 🌝 at this stage.
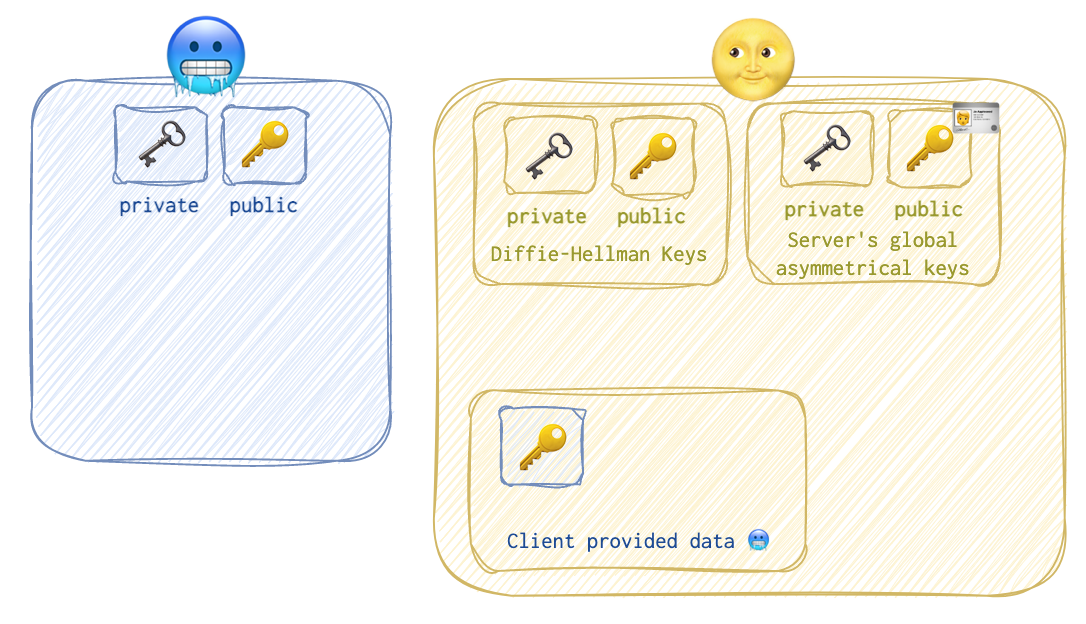 As you can see, the client 🥶 has only its own private 🗝️ and public 🔑 keys, while the server 🌝 has the following data:
- the client’s 🥶 DF public key 🔑;
- the server’s 🌝 DF public 🔑 and private 🗝️ keys;
- the server’s 🌝 host asymmetrical public 🔑 and private 🗝️ keys (these can be used, for example, with other clients or/and in SSL connections etc.). Let’s call them global. CA (certificate authority) will store the certificate with this public 🔑 key so that the server’s 🌝 clients can verify its identity. But that’s another story.
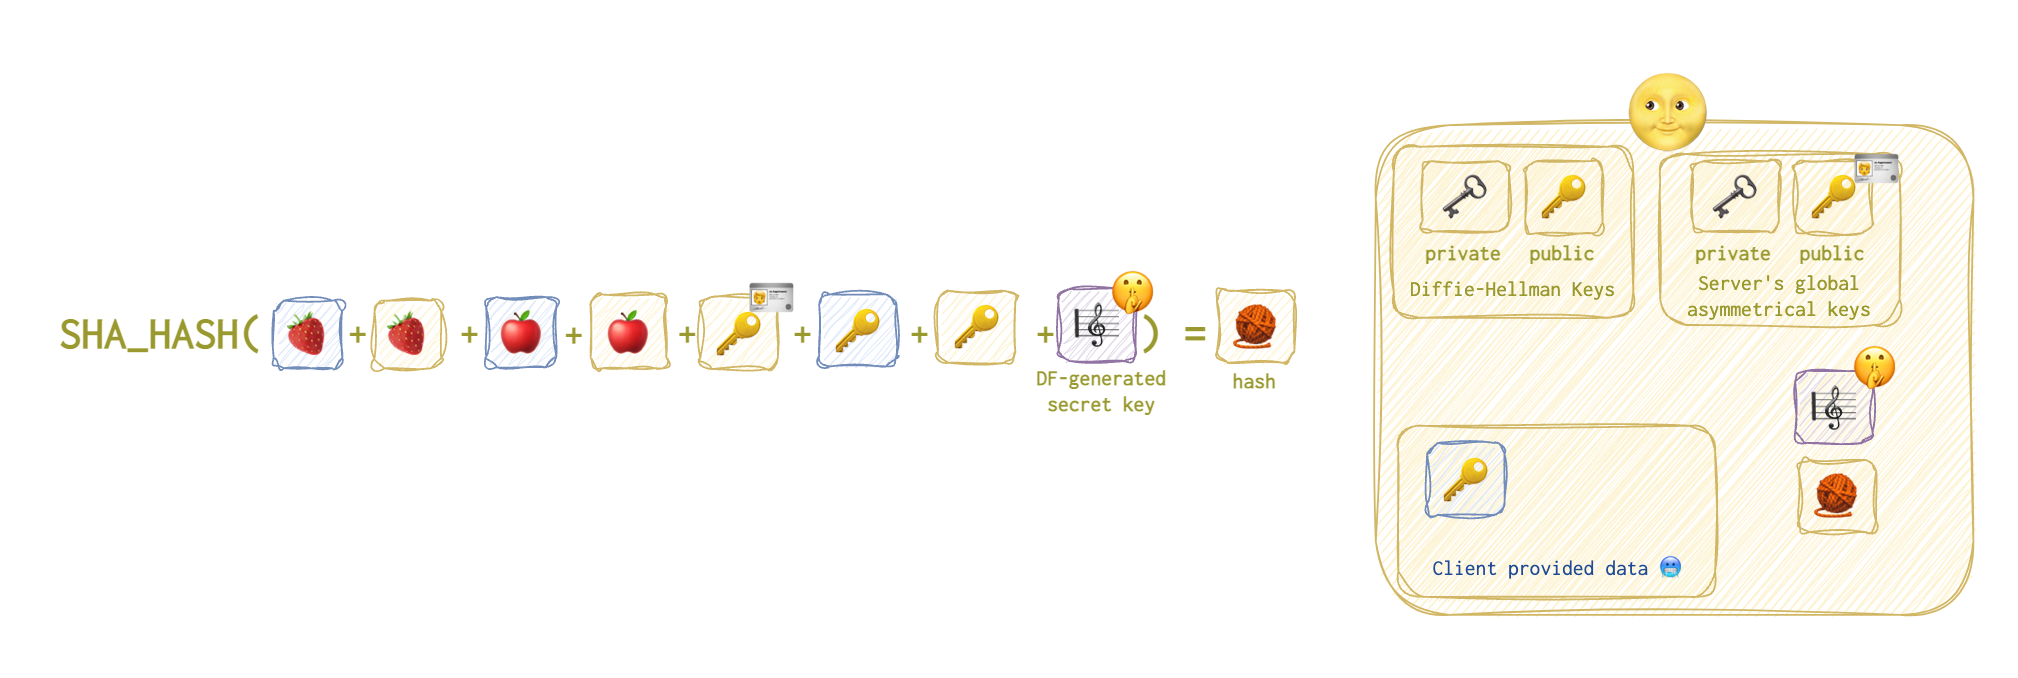
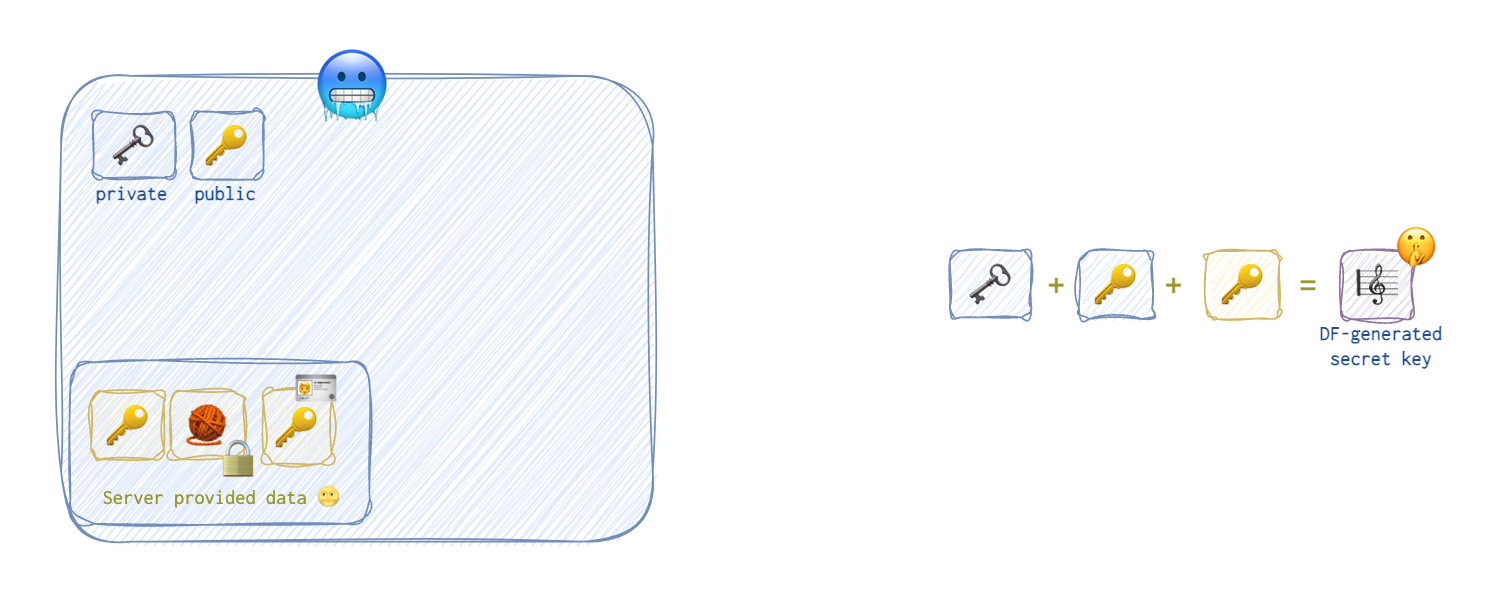
Both parties have all the information needed to generate a shared secret key 🎼 🤫 and a hash 🧶. Let’s take a little peek at the server’s 🌝 activity first. The server 🌝 takes its private 🗝️ and public 🔑 keys, plus the client’s 🥶 public key 🔑 shared previously to derive the value of the shared secret key (session key 🎼 🤫).
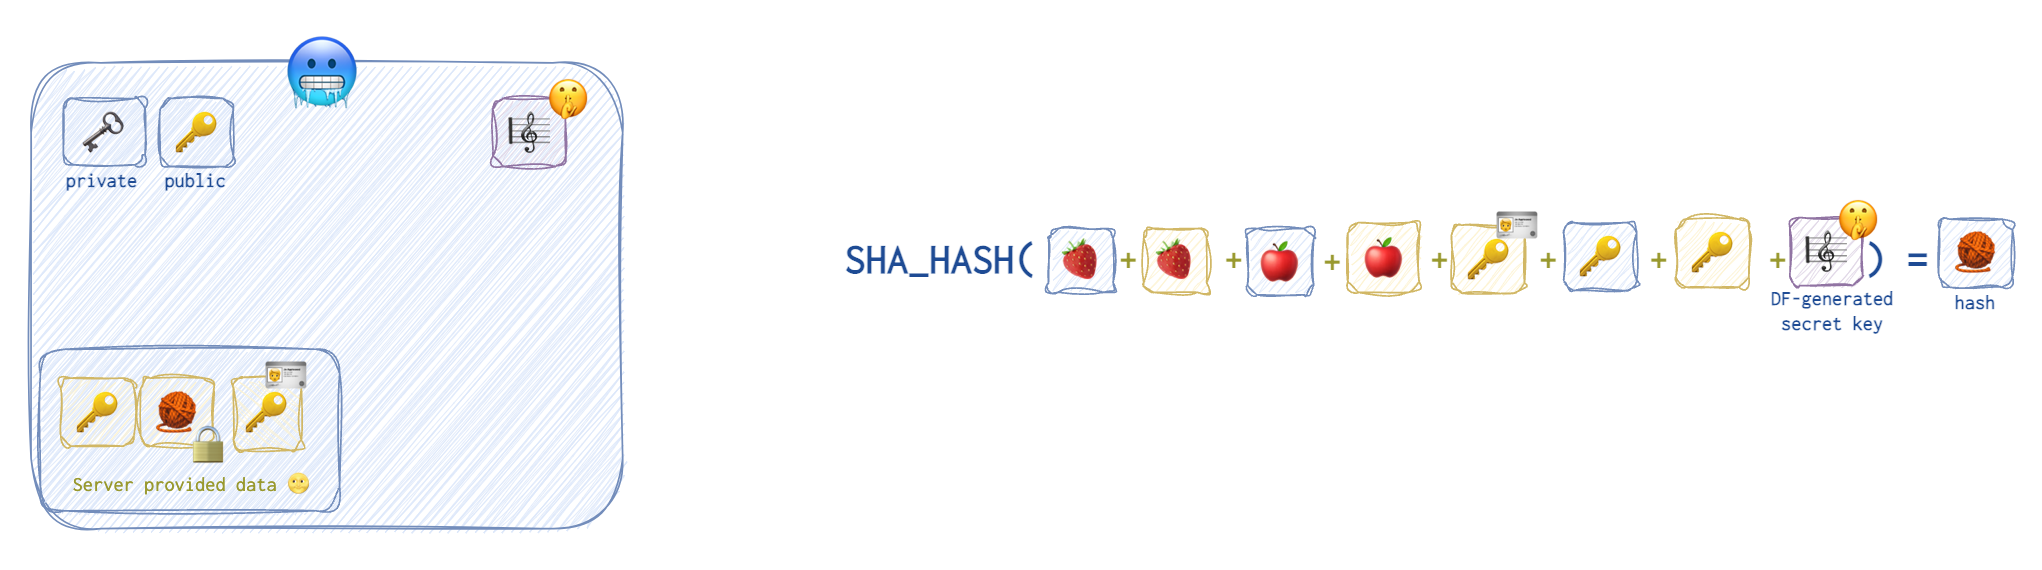
Then the server will calculate the hash based on the following data (the list is quite long):
- the client’s 🥶 identification string 🍓 (the payload of the first client’s request);
- the server’s 🌝 identification string 🍓 (the payload of the first server’s reply);
- the payload of the second client’s 🥶 request 🍎;
- the payload of the second server’s 🌝 reply 🍎;
- the server’s 🌝 global public 🔑 🪪 key generated long ago;
- the client’s 🥶 public 🔑 key;
- the server’s public DF 🔑 key that was generated at the beginning;
- the shared secret key 🎼 🤫 was generated in the previous stage.
 Now, the server 🌝 will sign this hash with its global private key 🗝️ 🪪 so that the client 🥶 who has its global public key 🔑 🪪 can verify that the server sent this. No one is supposed to have the private key 🗝️ 🪪 of the server 🌝 and the corresponding public key can only decrypt the message locked by the corresponding public key 🔑 .
❗️⚔️ If the private key 🗝️ was compromised, game over.
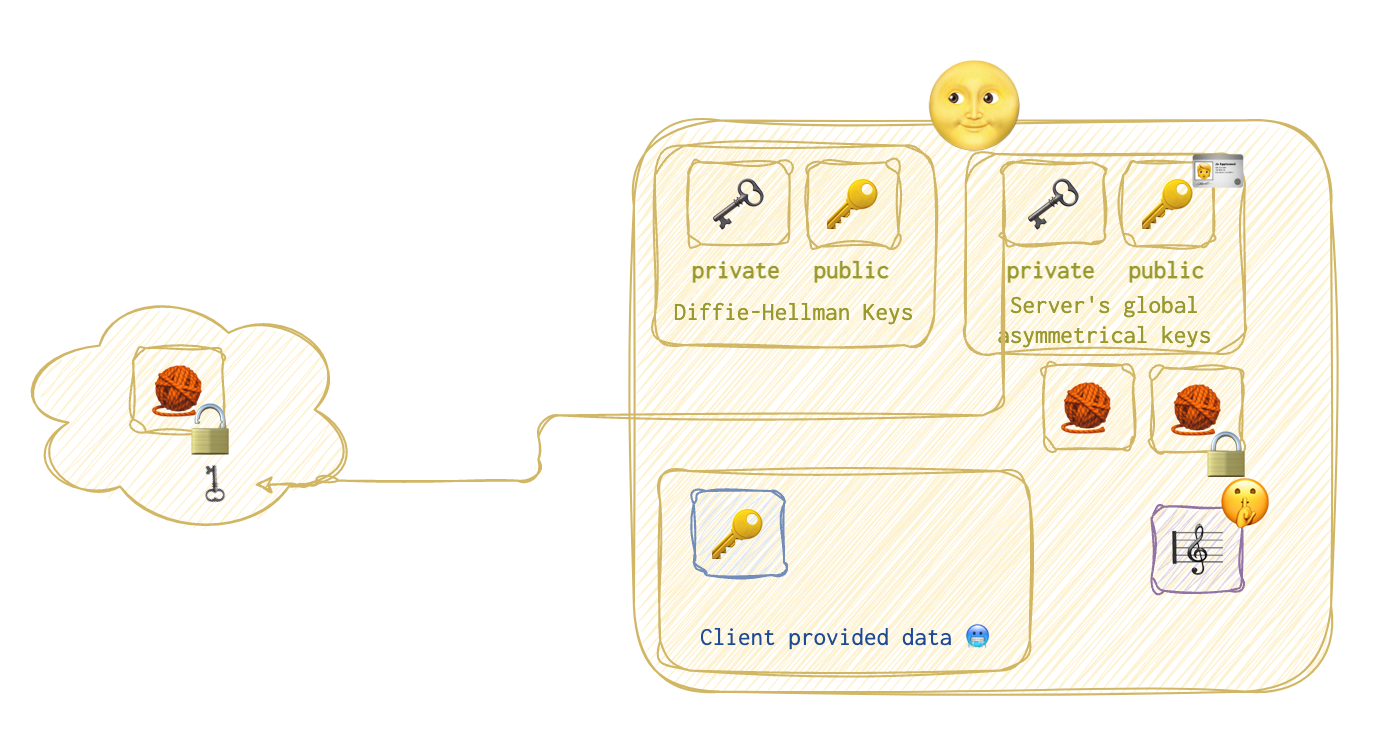
Now, the server 🌝 sends the calculated and signed hash 🧶, its DF public key 🔑 and the global public key 🔑🪪 to the client 🥶 so that the client 🥶 can repeat the same steps.
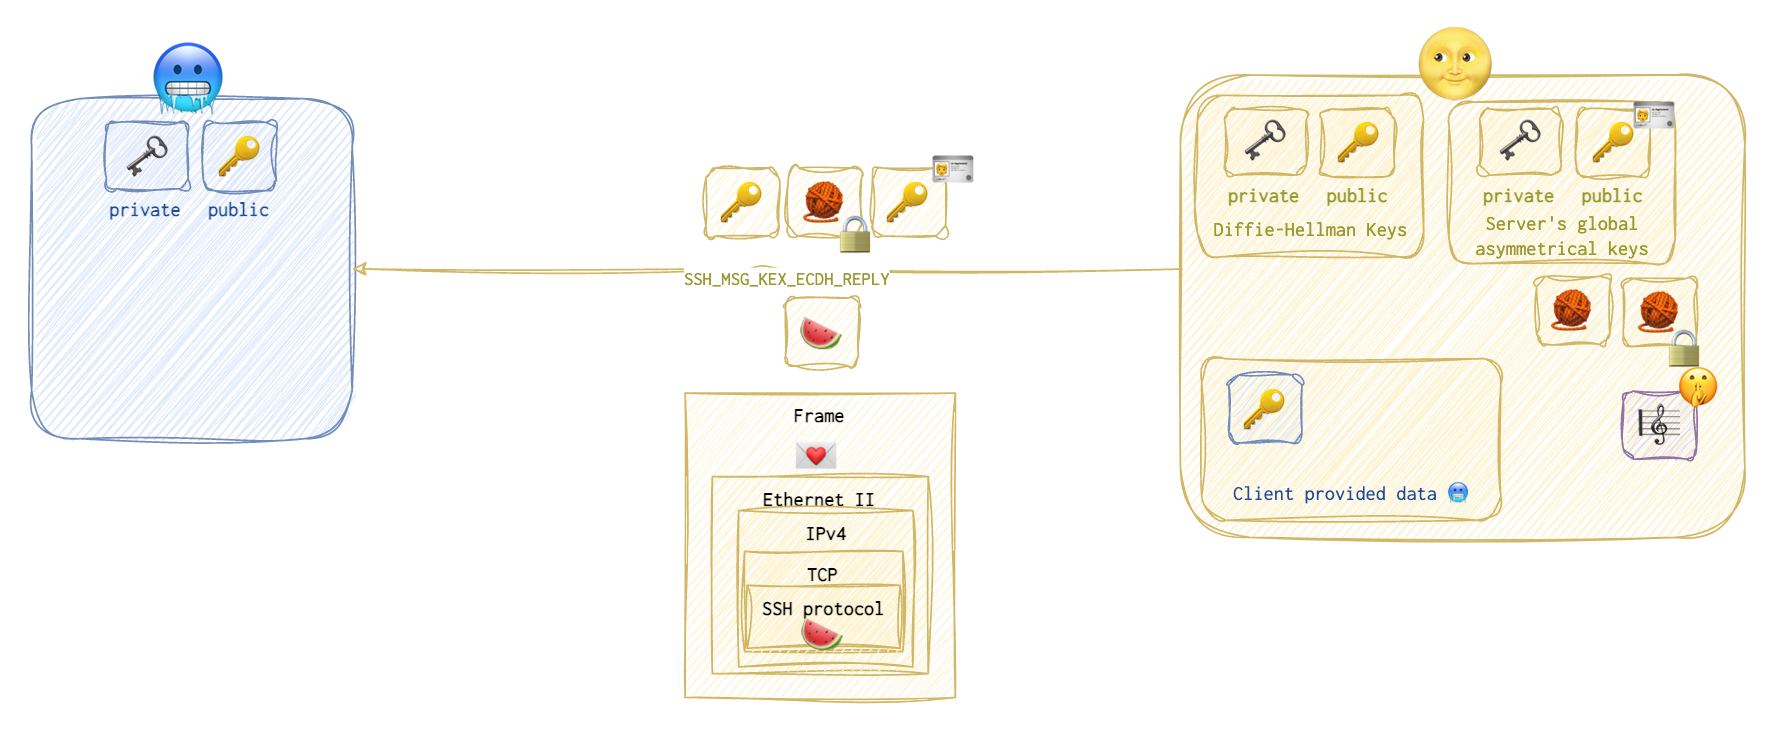 And so the client does. This message is called
 SSH Message Exchange Elliptic Curve Diffie-Hellman Reply 🍉.
First, the client 🥶 generates the same shared secret key 🎼🤫, but using its own private 🗝️ and public 🔑 keys (not the server’s) and the server’s global public key 🔑 🪪 received in the previous step.
 Now, it’s time to calculate the hash 🧶. Note the client 🥶 doesn’t yet touch the hash 🧶 sent over by the server 🌝.
❗️ ⚔️ Note that both the client 🥶 and the server 🌝 have all this data. However, the eavesdropper won’t have one little element: 🎼 🤫 the shared secret key. That’s because the eavesdropper has neither the client’s nor the server’s private keys 🗝️.
But now, the client 🥶 will use the server’s 🌝 public key 🔑 🪪 to unlock the hash 🧶 sent over by the server 🌝. After that, the client 🥶 will compare this hash 🧶 to the one the client 🥶 has just calculated.
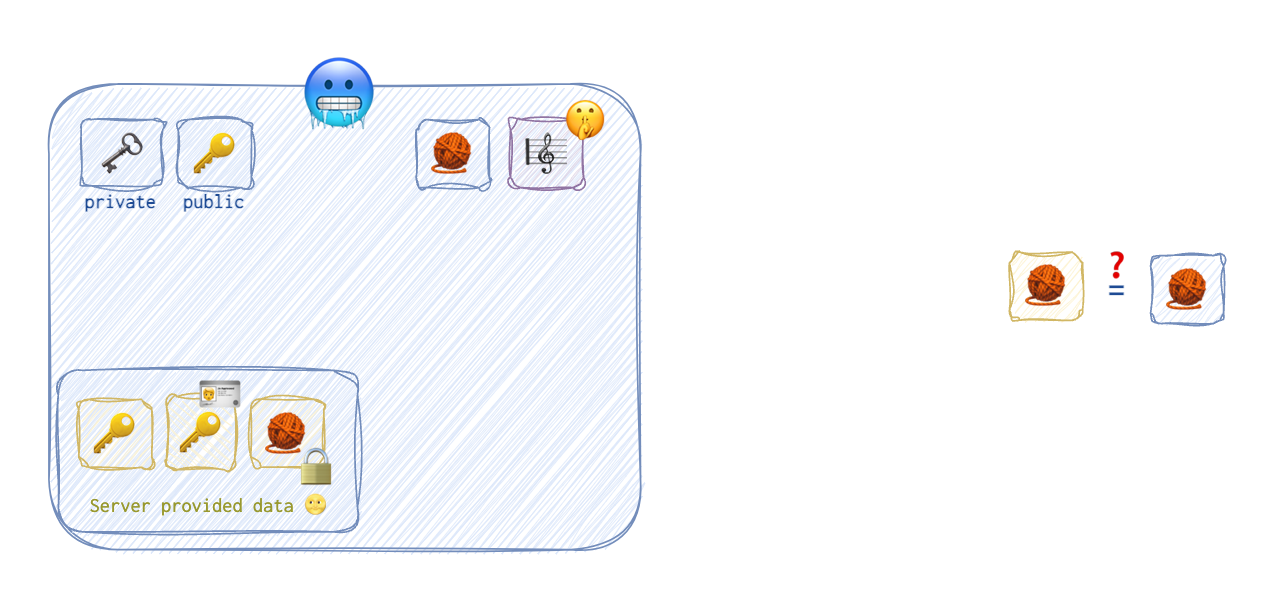
❗️ By the way, note that the client 🥶 doesn’t have nor it needs a client certificate 🥶 🪪.
🪛 Decryption Key Generation
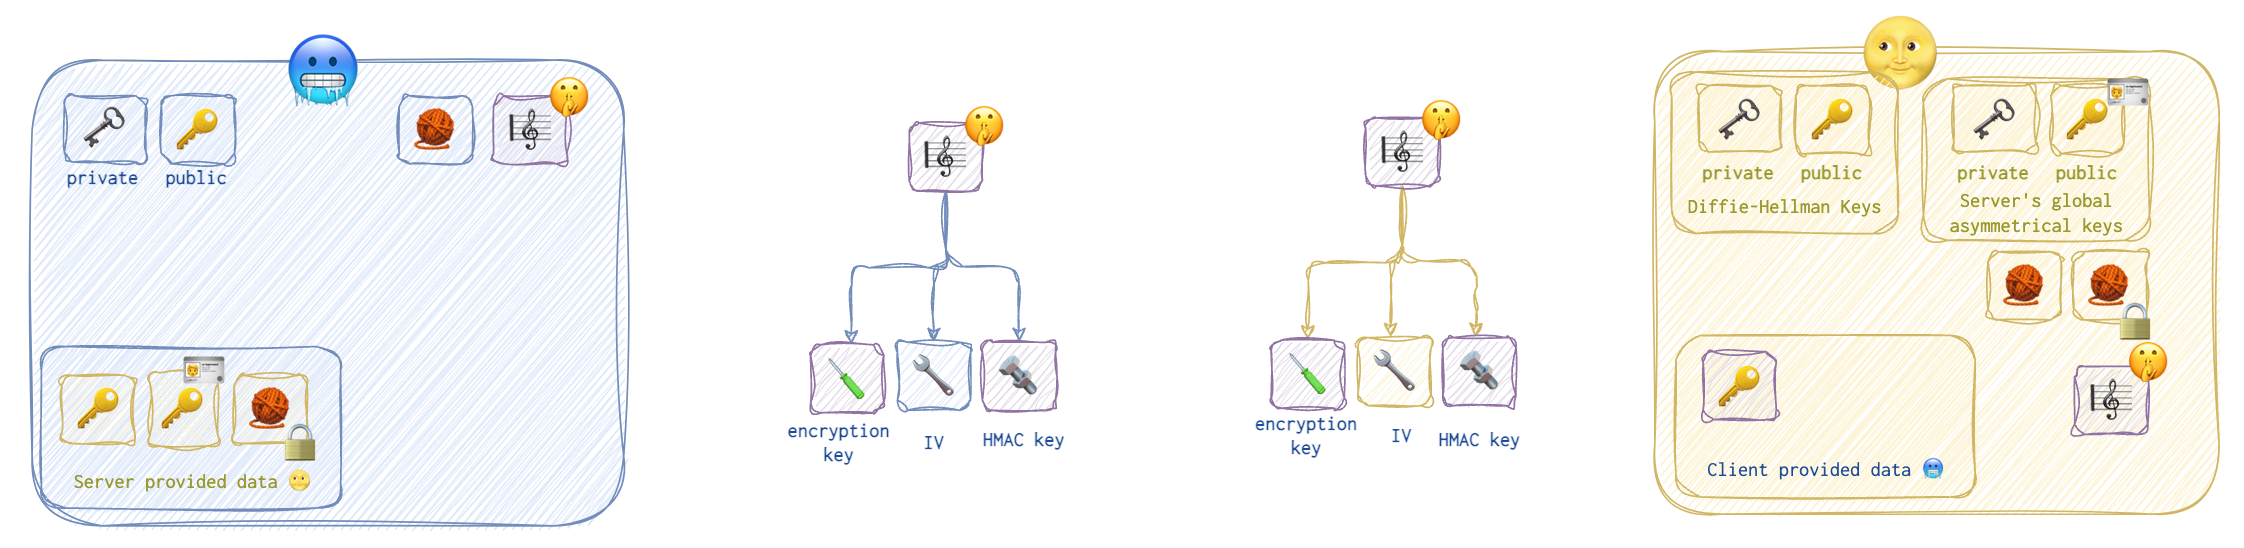
Now, at this point, both the client and the server have the session key (shared secret one), and can proceed to the next stage. At this stage, they both will derive three values from this session key:
- 🪛 Decryption key that will be used to encrypt and decrypt the messages.
- 🔧 IV (initialisation vector) - a random value generated separately by the client and the server to randomise the ciphertext.
- 🔩 A key for HMAC (signing the messages exchange to spot tampering).
❗️Note that 🥶🪛 = 🌝🪛, 🥶🔩 = 🌝🔩, but the IVs are random and thus different. IV is not a private value! I have tried to show this by using blue colors for client specific data, yellow - for server’s specific data, and purple - for separately generated data that’s the same for both parties.
Establishing The Connection
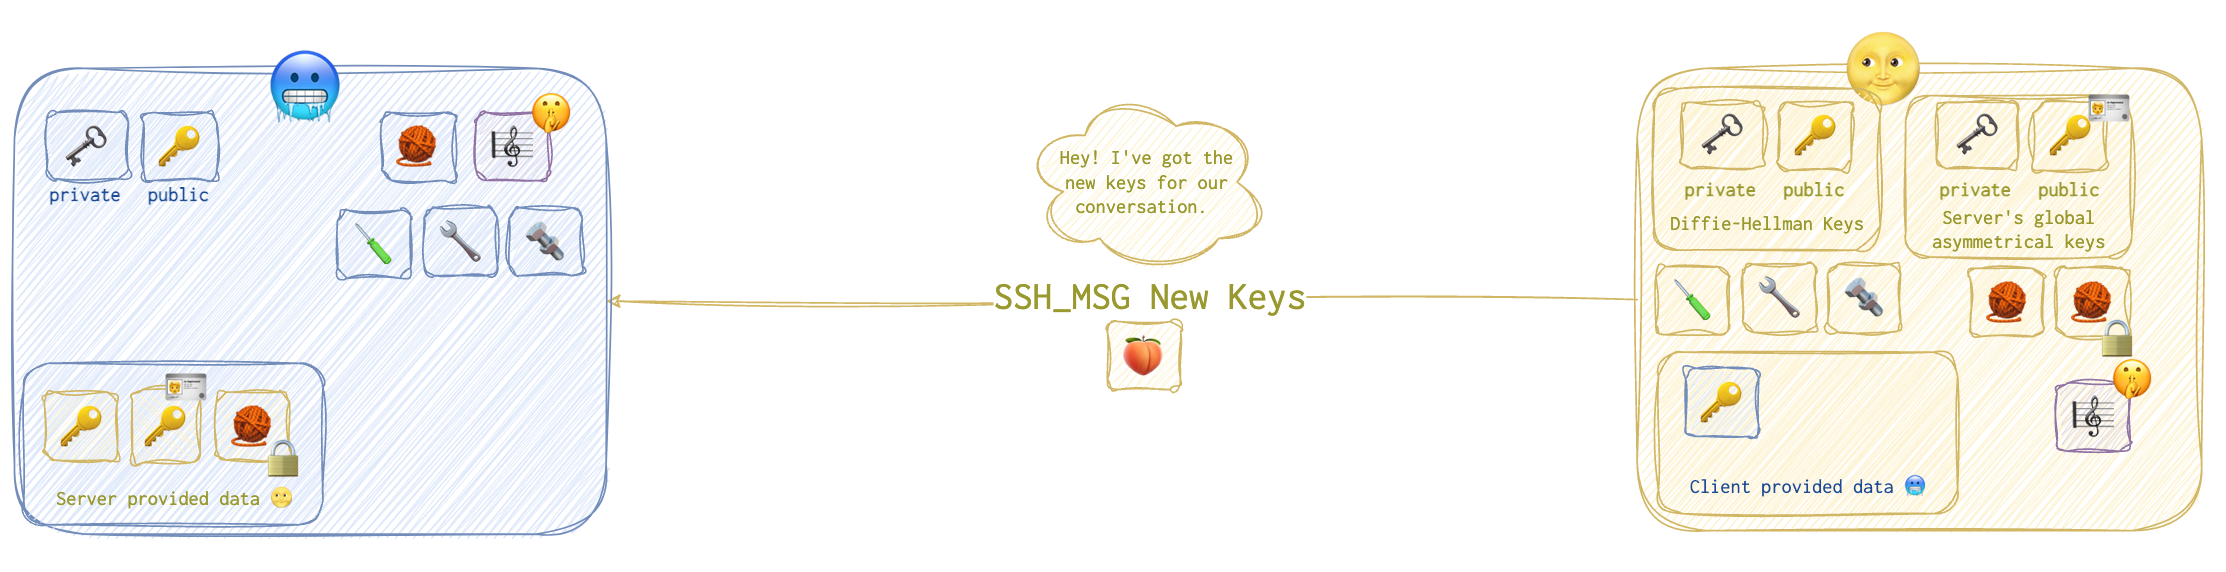
Now, the server informs the client 🥶 that it has finished and sends a New Keys 🍑 message over.
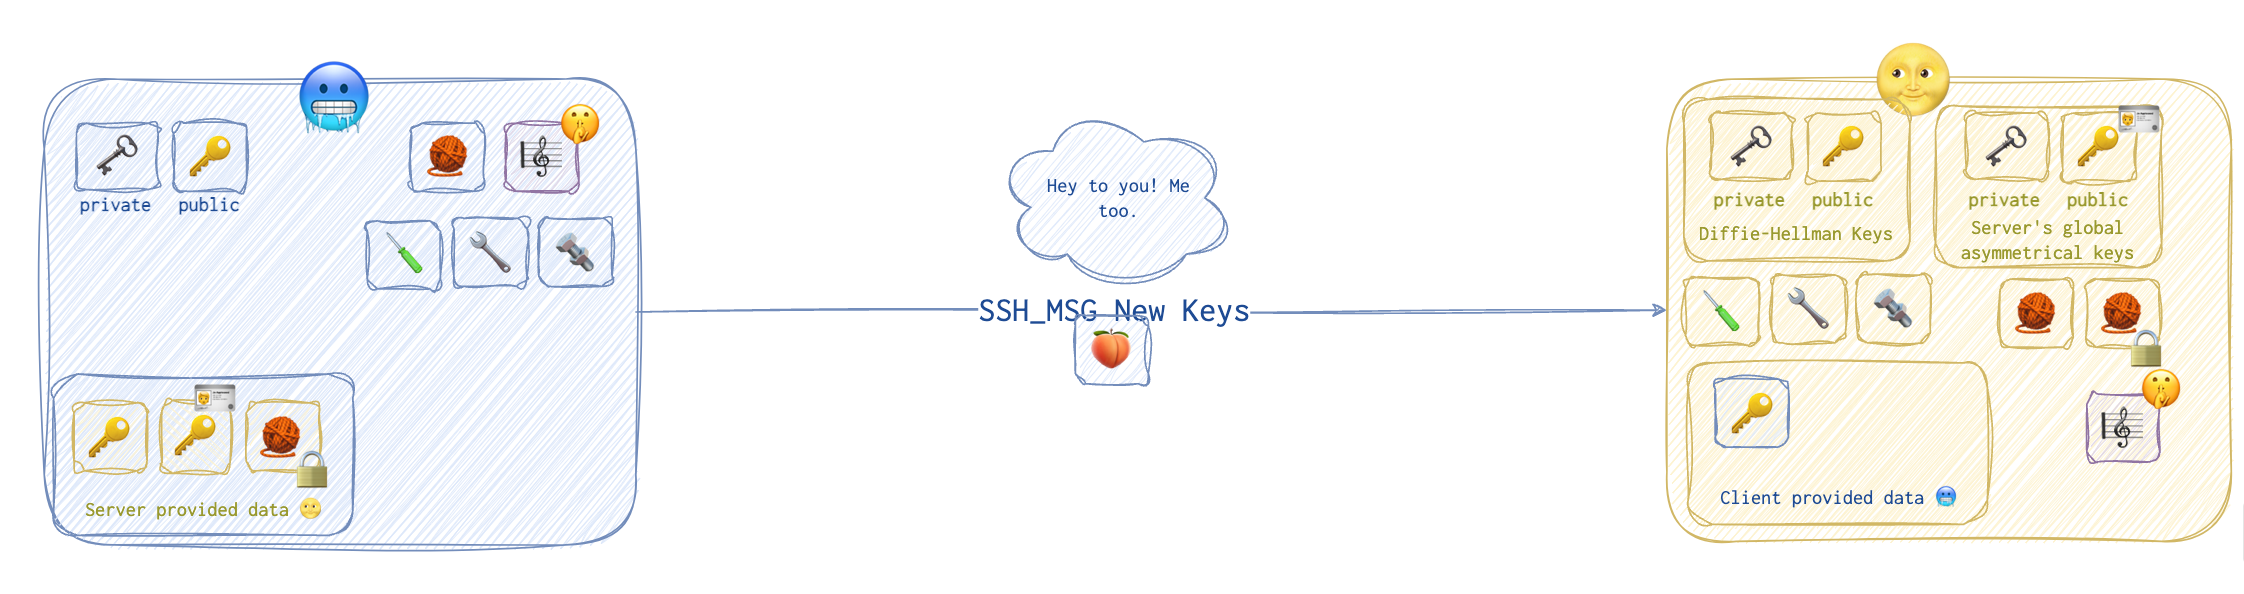
 The client 🥶 then responds with a similar message 🍑, also
 New Keys.
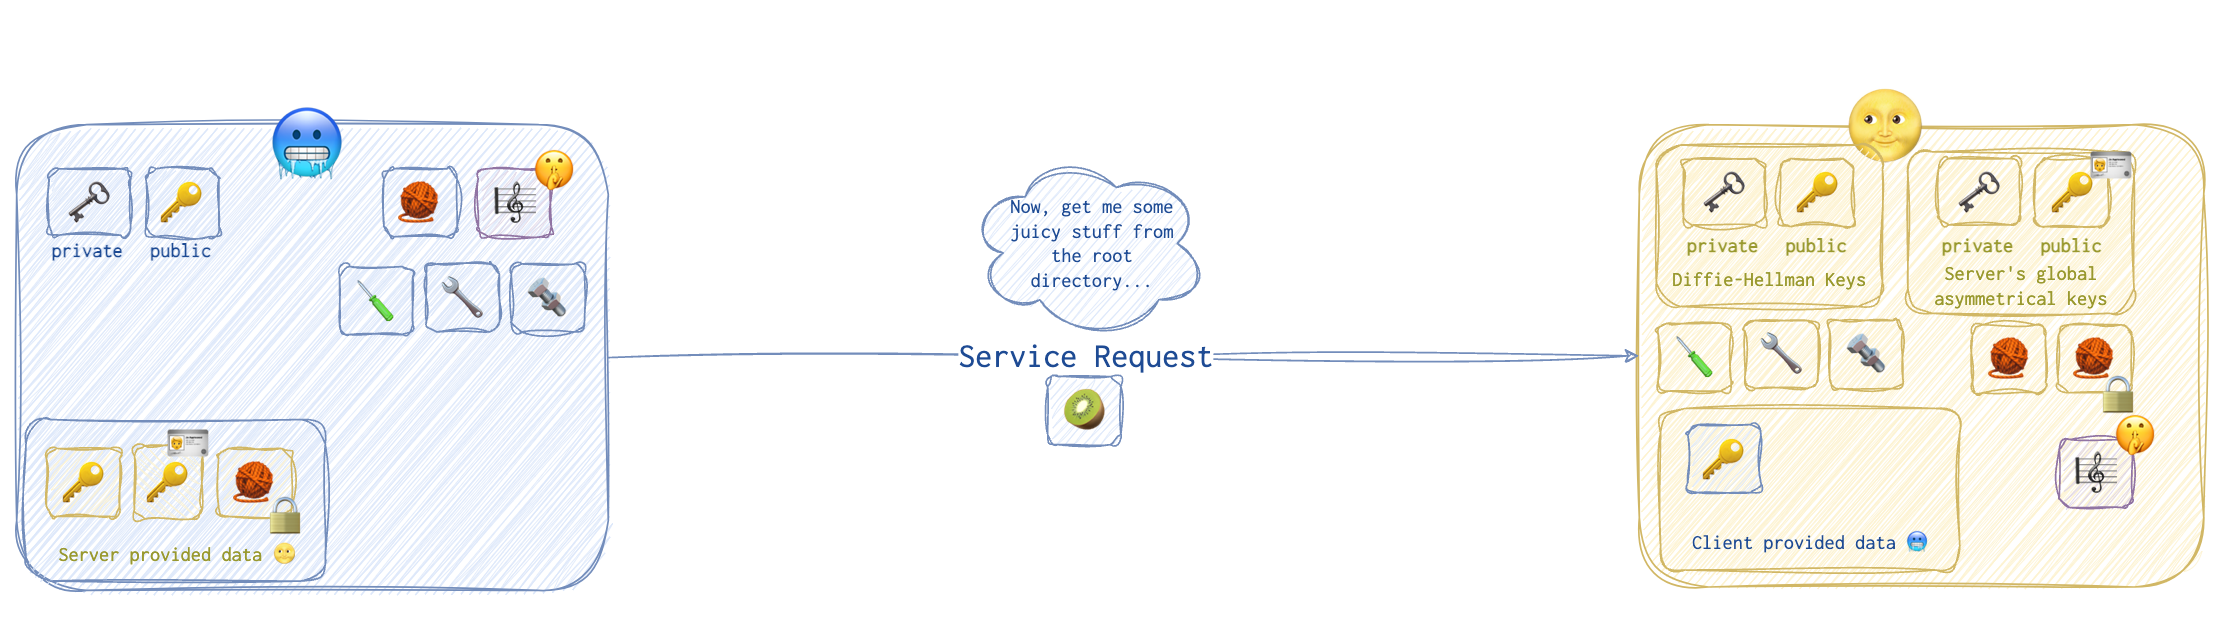
It took so long to establish this connection that the server 🌝 and the client 🥶 might have forgotten already what this was all about… . Ah, right, the service request!
The client sends a service request 🥝 message to the server.
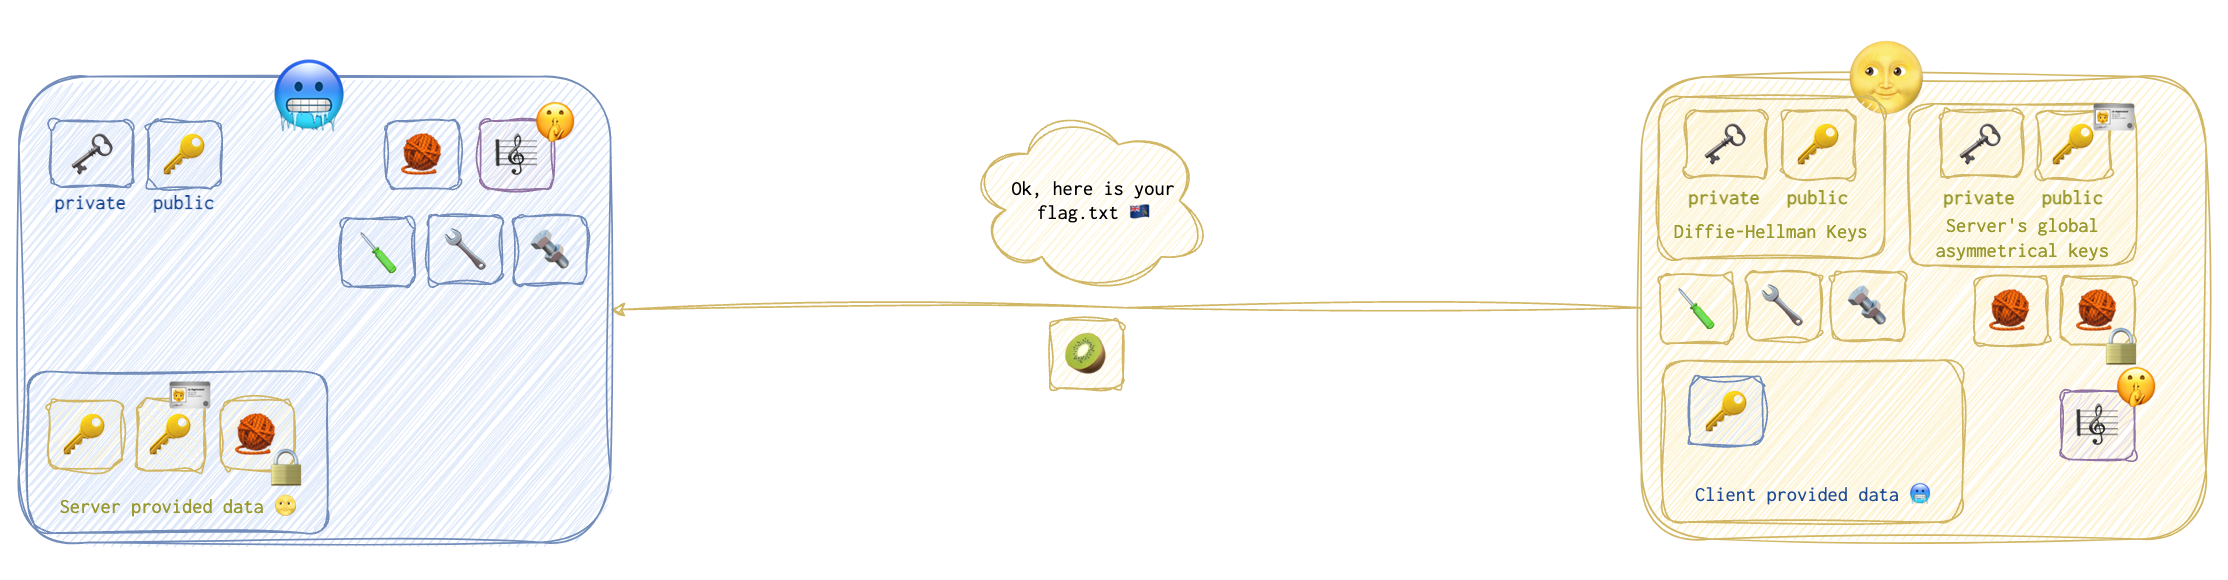
All is good, no point to back off at this stage, so the server 🌝 presents the lucky winner with a flag.txt 🇦🇺.
Attacks
Detection and Investigation
🛠 ExtraHop or 🛠 ntop (see Chapter 1) provides insight into the amount of data being transferred and to where even when that data is encrypted.
🛠 Wireshark Filters:
http.request- show only HTTP request. Useful to get rid of all ARP and TCP handshake garbage.ip.src == 192.168.22.94 and udp.port == 67- show the DHCP requests for this machine. Can show the computer name.