
FAT32 File Recovery
First, get familiar with the FAT file system. There are some things specific to this FS in the way the files are created and deleted. We basically need to follow the file deletion steps in the reversed order.
- Change
0xE5values in the directory entry set - Change FAT table values to indicate allocated (not
0x00000000) - Use the short file name directory entry (starting cluster and file size)
- Determine the cluster size using the volume boot record data
- Calculate the number of clusters needed (
int clusters = file_size / cluster_size). Keep in mind, that file size for folders is always00 00 00 00. So, don’t confuse a file with a folder. - Rechain FAT entries of the file
🔎 Intrestingly enough, this method worked on a FAT32 formatted flash drive. Why?
⚠️ If the file was fragmented (i.e. the clusters are not contiguous) it’s going to be harder to recover the file.
⚠️ If the directory entry OR/AND the data itself was overwritten - it will be impossible to recover the file. However, if the directory entry was overwritten, but the data itself was not - you can try to recover the file contents.
Example 1. Recovering a small file in a folder
The first step in recovering a gile is to change 0xE5 values in the directory entry set. That’s what we are about to do.
First, load the flash drive into Active@Disk Editor or another tool that allows viewing the raw contents of partitions and volumes. The below instructions are given for the Active@Disk Editor. You may use them for other similar tools however.
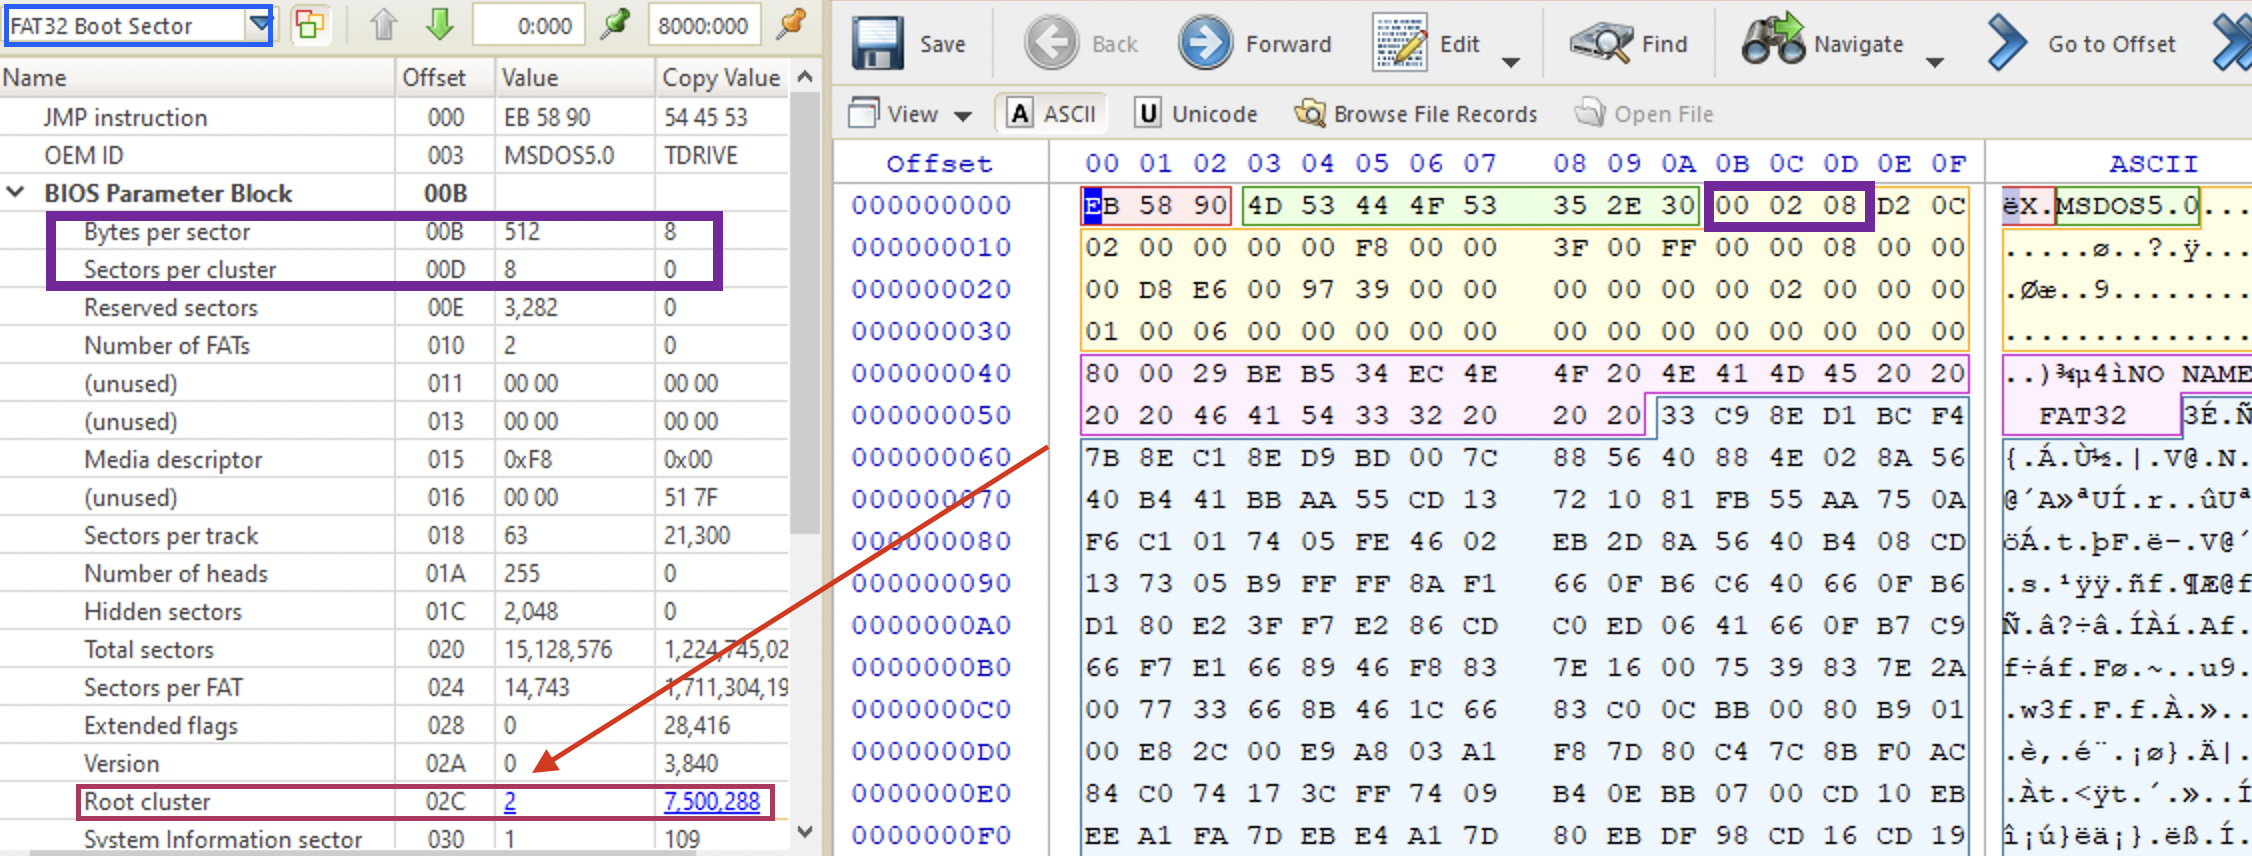
Active@Disk Editor loads the FAT32 formatted disk/partition at the start of FAT32 boot record by default. Note the cluster size. In my case there are 8 sectors per cluster and each sector is 512 bytes (both marked with a purple rectangle on the picture below both in hex on the right and in window to the left).
Navigate to the root directory first (the list of files and folders in the root directory) either by clicking Naviagate > Root Directory or going to the second cluster (Root directory is always at the second cluster. In case you forget the location of a root directory, you may also click Root cluster field value in the left part of the window when the FAT32 boot record template is applied:
Once we get to the root directory, we need to find our folder’s entry. Keep in mind that the size indicated in the short file name entry of a folder will always be 00 00 00 00. Also, the attributes will also indicate 0x10 (directory). Choose FAT directory entry in the template list (marked with a blue rectangle on the picture above) if it was not chosen automatically. Find the short file name of the folder. In my case NEWFOL~1 (the last one). Right-click and choose Set template position here. Click the entry to apply the highlighting. Read the low word and the high word for the first cluster number (the high word is marked with orange 🍊 on the picture below and the low word - in blue 🐬).

Each value is to be converted to little-endian: 0x06 0x00 becomes 0x0006 and 0x0000 remains the same. Now combine the two: 0x00000006. Click Go to sector on the top pane, convert the value to decimal or enter it in hex with 0x prefix. In my case, 0x06. Click Enter. This will throw you right to this folder’s contents (list of files and nested folders). In my case, there is only on user-created file there (+1 user-created file deleted).
🤬 If the field for the cluster number is not active
✍️ …, try reloading the drive.
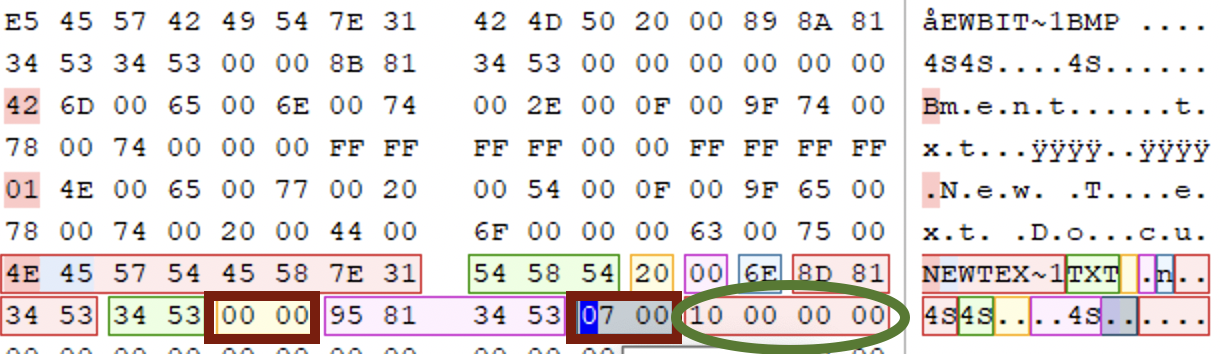
Locate the short file name, then locate all the long file names above it. In case the file is not deleted, it would be until you find the long file enrty starting with 4 (see the example below).
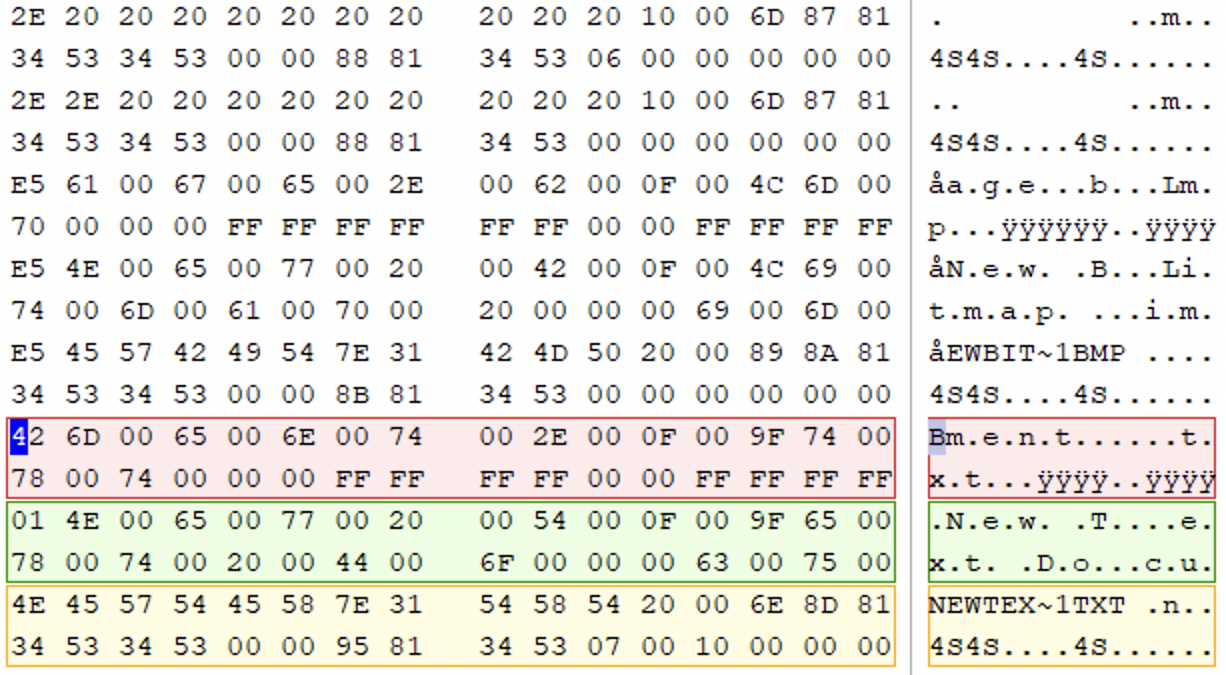
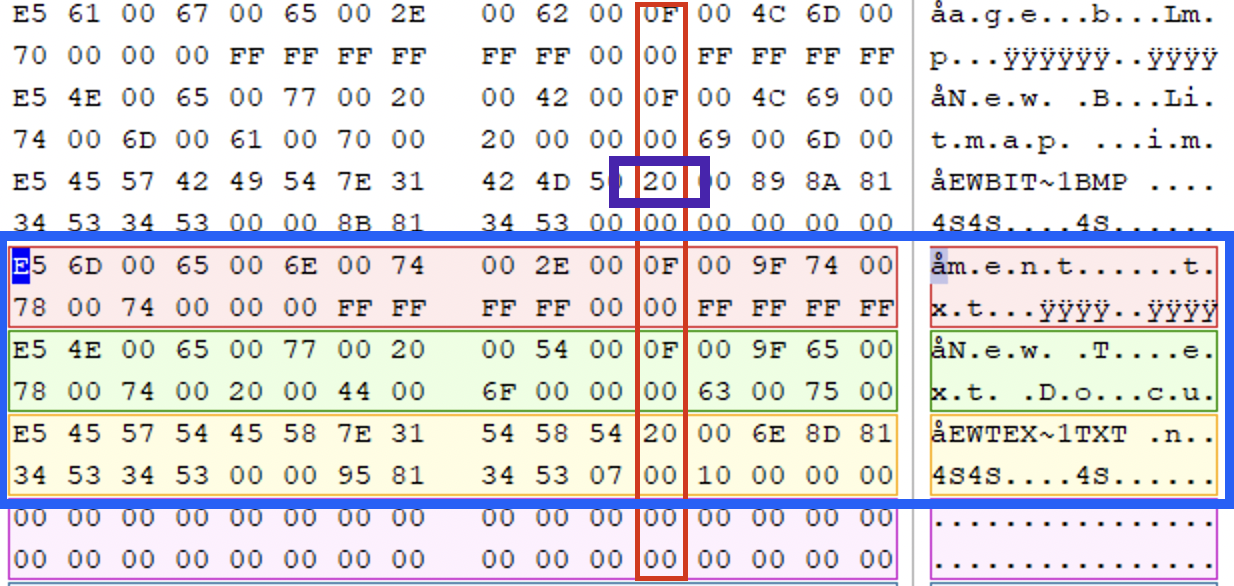
However, since the files are deleted, the first nibble for each entry in the set is E5 now. That’s why we’ll need to find the last long entry by looking at the file name and looking for extension. Another method would be to look at the 0x0A offset and read until you see the last case of 0x0F (marked with a purple rectangle is the next entry which is not a LFN since it’s vlaue at offset 0x0A is 0x20). In my case, there are only two long file names. Right click at the beginning of the last long file name and choose Set template position. You’ll see something like the below picture. Highlighed in yellow is the short file name, two entries above it (green and red) are for the long file names. All the three start with 0xE5.
Note that structure of this file set is broken and Active@Disk Editor can’t find the end of it, but we know where it is (marked with a blue rectangle).
Now click the short file name entry is broken (the first character is unknown, remember it’s now 0xE5). This is where the LFN entry will come in handy. In the long file name entry the first byte doesn’t indicate a file name character, but a status byte. That’s why the file name was unchanged (the second byte of the LFN) and is equal to 0x4E. Now we now, what was the first byte of the SFN entry (short file name entry).
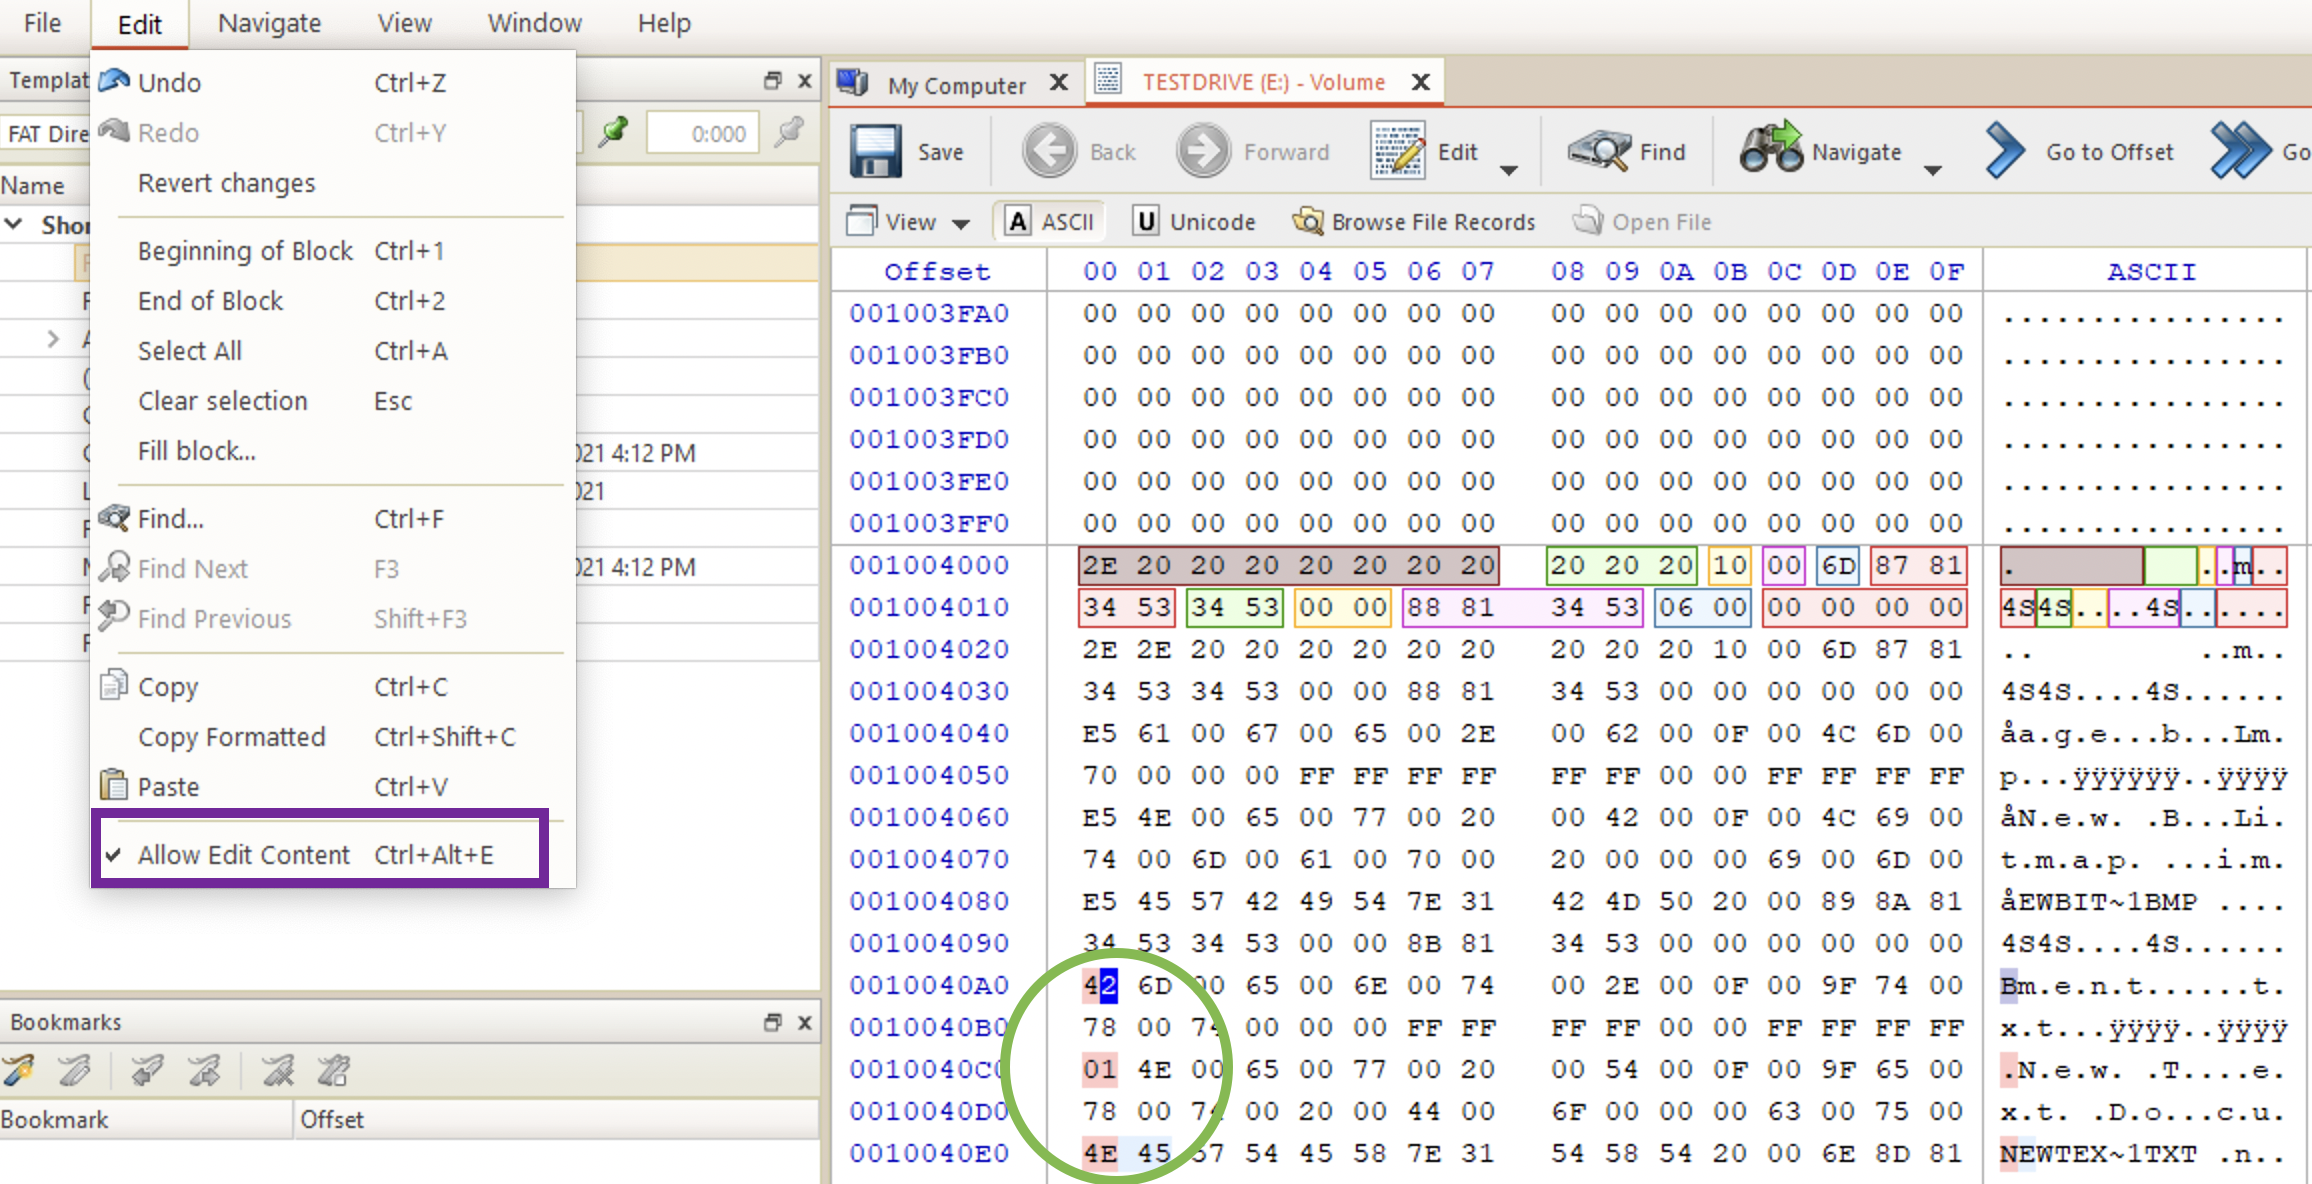
Now, lets fix the first bytes of each entry in the set. Thanks to the LFN, we know the first character of the file name and thus - the first byte of the SFN. So, the first byte of the SFN is 0x4E (ASCII N). Now, we know that there are just two LFN entries above it, and the second is the last. So, the first one’s first byte should be 0x01 and the second one - 0x42 (the last entry in the set starts with 4, remember?). These changes are marked with a green circle on the picture below.
Now, to the next step. The next step is to change FAT table values to indicate allocated (not 0x00000000).
We note the number of the first cluster and the file size. In the picture below, the first cluster for the file is 0x00000007 (little-endian, remember?). The file size is 0x00000010 (little-endian again, so you flip all the bytes), 16 bytes (decimal).
We know from the volume boot record that 1 cluster contains 8 sectors, each 512 bytes. Since the file occupies 16 bytes, it is much smaller than 1 sector. So, it occupies 1 cluster. So, we don’t need to worry about chains in FAT1 and FAT2. Now, the first cluster is the 7th one. Let’s go to the FAT1 and find the entry for the 7th file.
🧪 When I looked at the 7th cluster in the FAT1, it still had the value
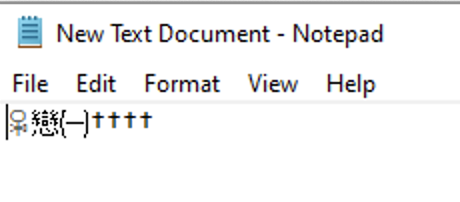
0xFFFFFF0F, which means that the file was not deallocated. I thought that might have been a bug and restarted Active@Disk Editor. However, the value remained unchanged. I’ve checked several times that the file was indeed deleted permanently (yes it was). I then created a file in the root directory and deleted it, restarted Active@Disk Editor and checked the FAT1: the cluster for this file was zeroed. Might it be so, that the files are deallocated only when the folder is the root or the folder is deleted?✍️ It looks like the flash drive was mounted to macOS at some point (not the Windows VM). macOS writes its own meta crap 💩, so my deleted file’s contents (not the directory entry) was overwritten! How I’ve figured that? Well, I have fixed the SFN and the LFN. The FAT1 I have left untouched, since it’s already marked as allocated. The file appeared in the folder, but it’s contents was esoteric:
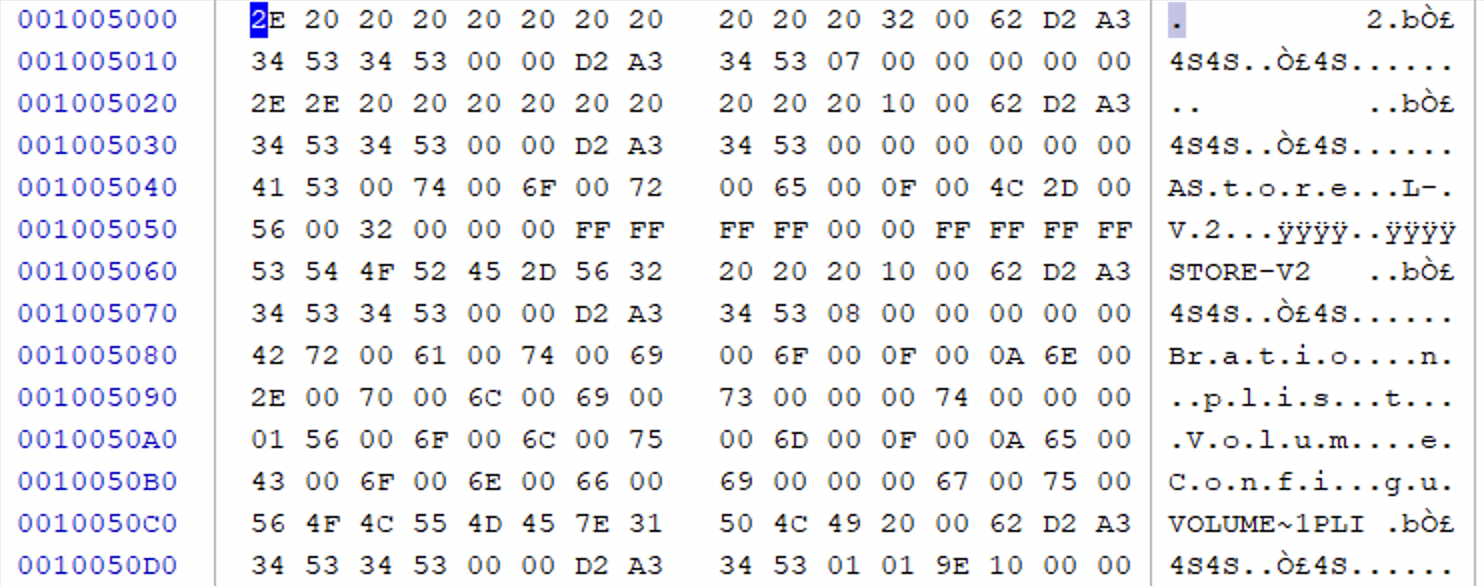
Since the file contents was supposed to be at cluster 7, I’ve opened it in Active@Disk Editor at analysed the contents:
It’s definitely not the things I wrote. Besides, observe the first 32 bytes starting with
2Eand the second 32 bytes, starting with2E 2E. This a FAT directory. Then the files that it contains:Volume Configuration.plistandStore-v2. Theplistextension tells me that it’s a macOS config file. So, that’s what happens if the file contents overwritten but its directory entries are not! 😃
Given the above story, I had to create and delete another file New Document (2).txt in the same folder. The SFN and LFN entries were fixed in the same manner:
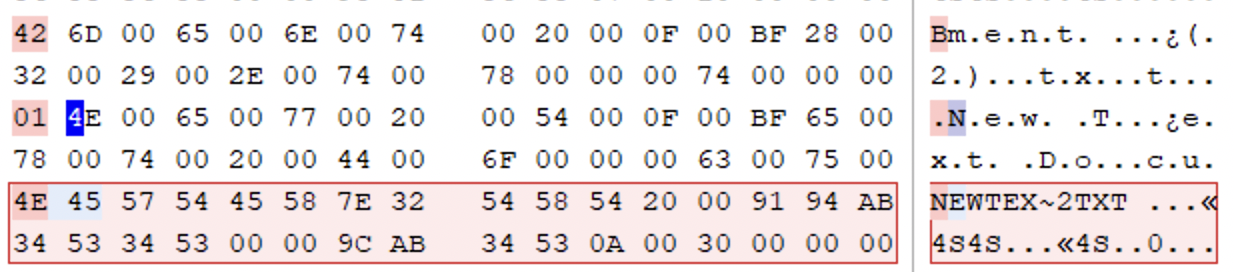
This time the cluster number was 0x0A (10 in decimal). We navigate to FAT1 and find this cluster in the list. For better accessibly you may set bytes per line to 4 in Preferences (since each entry is 4 bytes long). We skip the first two entries (they stand for media desscriptor and FAT version) and start counting from 2 (the first entry is cluster 2). We find the cluster:
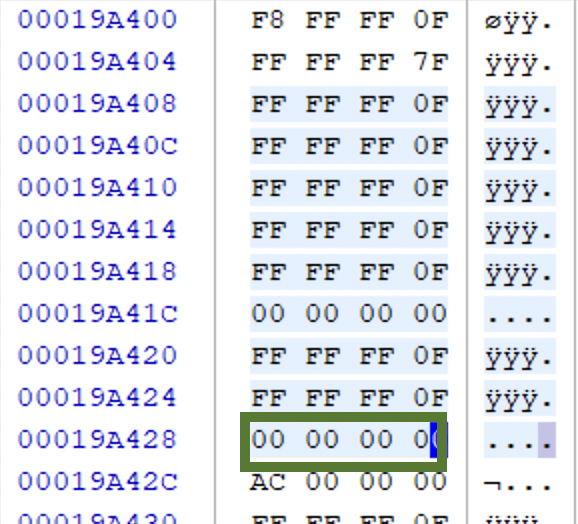
Change these 00 00 00 00 to FF FF FF 0F.
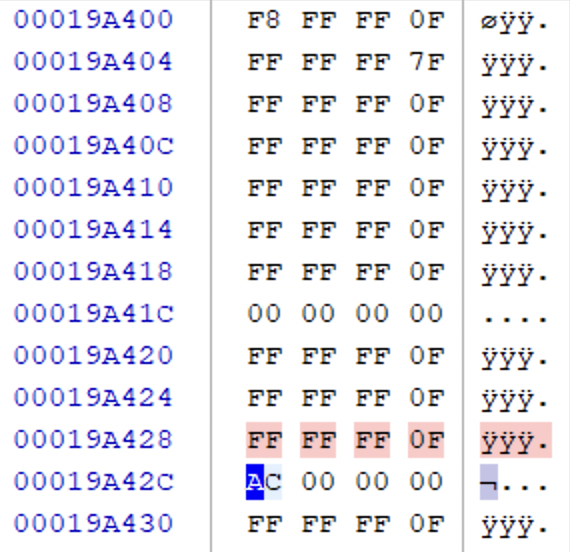
Let’s save the changes:

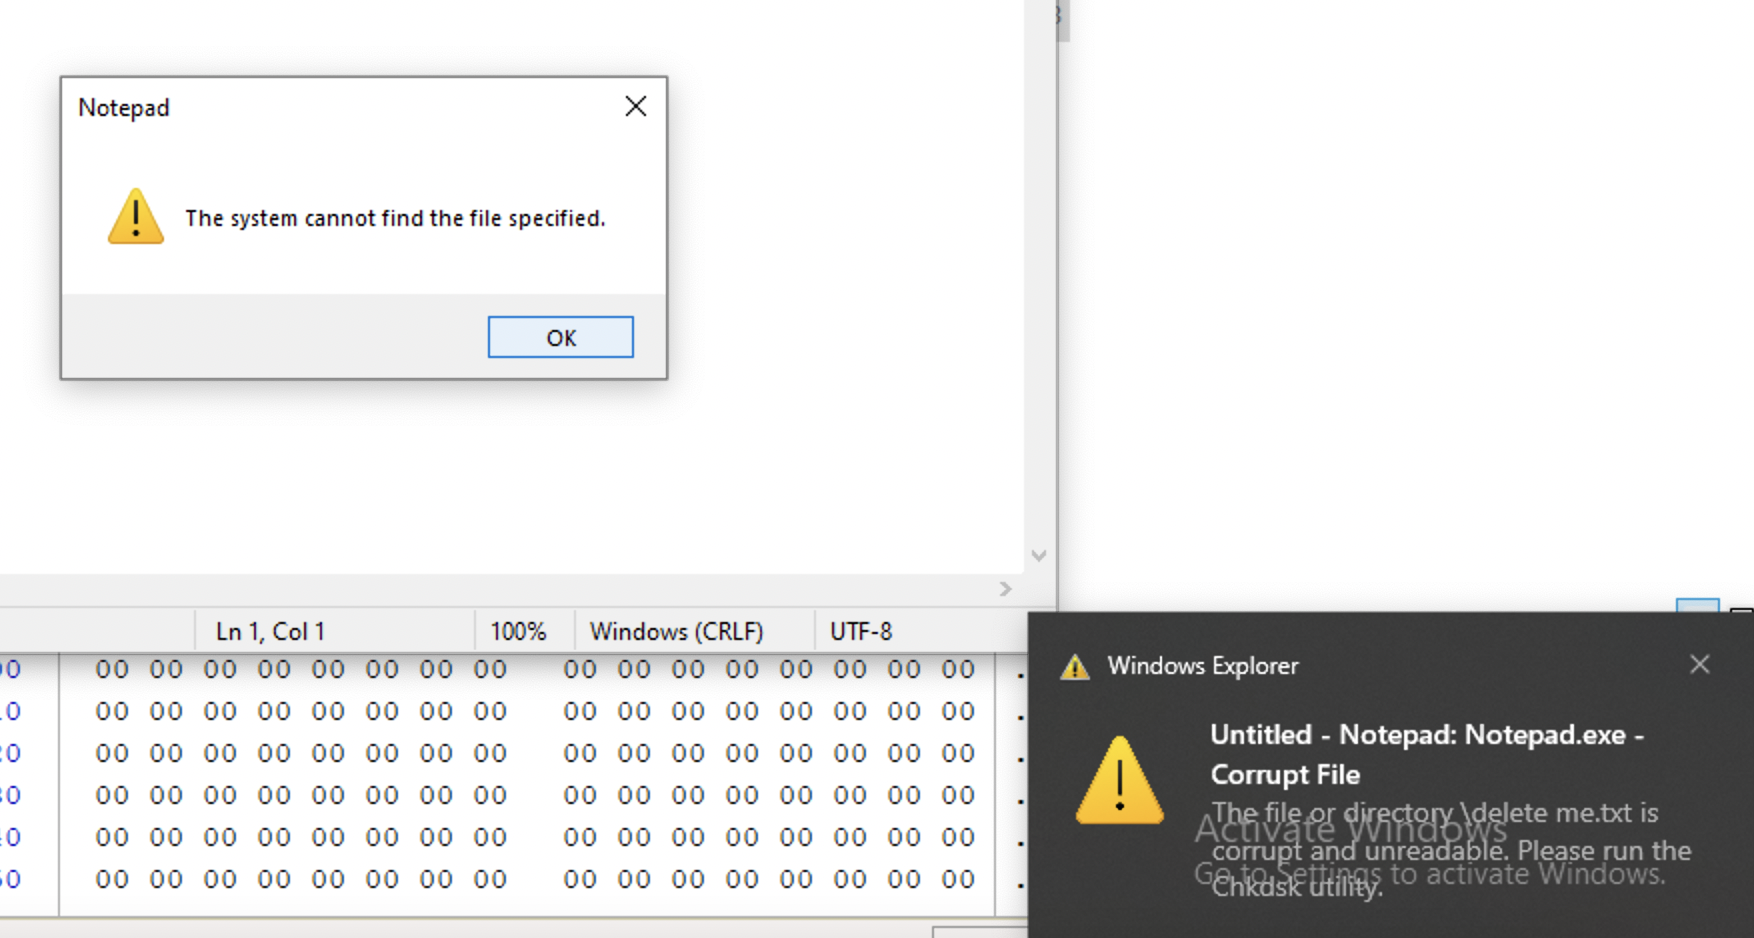
🔎 What if the file’s SFN and LFN are fixed but the FAT1 entries are not? Well, the file will be visible, but if you try opening it, you’ll get the below error:
Now, let’s check the file in File Explorer:
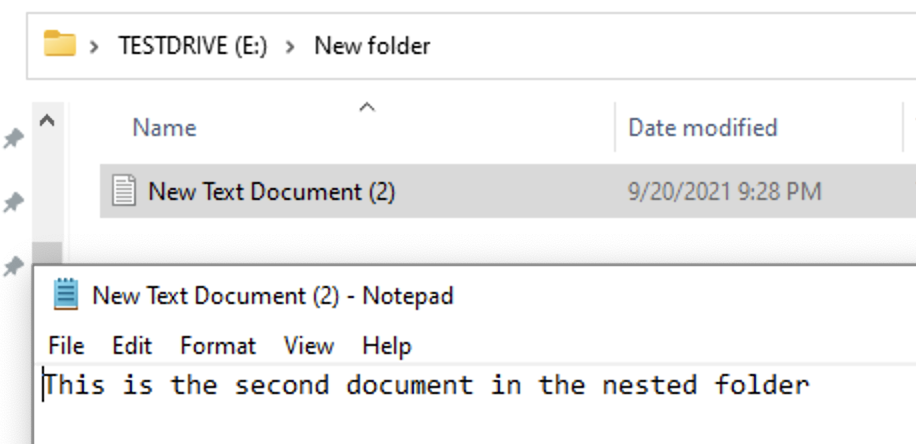
It’s back 😁!
Example 2. Recovering a contigious fragmented file
exFAT File Recovery
More read here.
- ❓how many sectors per cluster (offset
0x6Din the boot record)? Keep in mind, it a shift value, i.e. you need to raise 2 to this power in order to get the actual number of clusters per sector. - locate the dir enry set either bu going to the root cluster (in my case, the 4th cluster) and finding the record manually or by clicking
Browse File Recordsand selecting the folder under examination from the list. - use the information from the set (file name, size and starting cluster) to carve the file. The stream entry contains this information. Go the cluster specified and list until you either reach the end of the allocated space (using the file size).
If the directory entry set got overwritten - carve the file.
If not, you could try reversing the Bitmap bits and the directory entry set first bytes, but generally the above is enough to get the file contents. This of course will not make it appear in the folder again, since for that you’d have to manually fix Bitmap, FAT (in case of a fragmented file) and the dir entry set.
🧪 Create and delete files to observe, how the Bitmap gets changed.